
10 Essential Home Gardening Tools for New Gardeners
You Don’t Need a Shed Full of Gear to Get Started
Step into any garden center and you feel intimidated.
There are hundreds of tools on the shelves. They all claim to make gardening simpler. The salesperson is telling you that you need all of them.
Here’s the truth: you don’t.
The majority of new gardeners waste hard-earned funds on fancy gadgets never used. In the meantime, they’re overlooking the basic tools that do matter.
This guide dispels all the noise. We’re here to round up the must-have home gardening tools for those new to gardening, and you will use them each and every week. No expensive extras. No complicated machinery. All the dependable standbys that every good gardener has.
So, let’s get that starter kit of yours together the smart way.
Tool 1: Hand Trowel – Your Go-To Implement
There are thousands of tools made for the garden, but none sees as much action as the hand trowel.
If you’re going to buy only one gardening tool, make it a hand trowel.
This little, handheld shovel does it all. Digging holes for transplants. Scooping soil into containers. Removing weeds. Mixing compost.
You’ll reach for it constantly.
What Makes a Good Hand Trowel
Look for these features:
Heavy metal blade – Plastic will break in no time. Stainless steel or carbon steel will last you years.
Comfortable grip – You’re going to hold this a long time. Cushioned handles prevent blisters.
Secure connection – The blade must connect securely to the handle. Cheaper trowels will flex or snap at this joint.
Measuring marks – Some trowels feature depth indicators on the blade. This will assist you to plant seeds and bulbs at the optimum depth.
How Much to Spend
- Low end trowels: $5-8 (one season)
- Mid-range trowels: $12-$20 (a few years with care)
- Top of the line: $25-$40 (lifetime investment)
Start with a mid-range option. You’ll use it enough that quality matters, but not so much so that you’d cry if you left it behind while gardening.
Pro Tip for Beginners
Rinse your trowel clean every time you use it. Dry and store. This is just one easy way to stop rust from forming and keep the blade sharp.
Tool 2: Bypass Pruners – The Power of the Clean Cut
Plants should be pruned throughout the growing season.
Dead flowers. Overgrown branches. Harvesting vegetables. You want pruners that make clean, precise cuts.
Dull or improper tools leave raggedy cuts that invite disease in your plants.
Bypass vs. Anvil Pruners
There are two main types:
Bypass pruners – They function the same way scissors do, with two sharp blades shearing across one another. This makes for the cleanest cuts on live, green stems.
Anvil pruners – A single sharp blade cuts down against a flat edge. Better on dead, dry wood but crushes live stems.
For general gardening, bypass pruners are always the best option.
Finding the Right Fit
Pruners come in different sizes. Feel them in your hand at the store.
Can you open and close them easily? Do they fit your hand size?
Small hands need compact pruners. Larger hands need full-size models. If it’s the wrong size, you’ll have hand fatigue and sloppy cuts.
Safety Features to Look For
- Safety lock – Prevents the blades from opening when not in use
- Non-slip grip – Minimizes accidents when hands are wet/dirty
- Colorful handles – Helps you spot them in the garden
| Pruner Feature | Why It Matters | Price Impact |
|---|---|---|
| Replaceable blades | Extend tool life by years | Add $5-10 |
| Ergonomic design | Prevents strain in your hands | Add $8-15 |
| Stainless steel | Won’t rust or develop sap buildup | Add $10-20 |
You should plan to spend $15-30 for a good quality set of bypass pruners, and a decent pair will last you years.
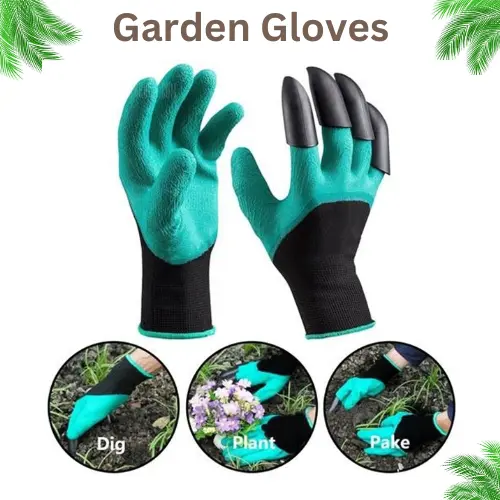
Tool 3: Garden Gloves – Keep Your Hands Safe
Gardening is dirty work.
Your hands touch soil, thorny plants, rough wood and chemicals. Good gloves ward off cuts, blisters, splinters and skin irritation.
Also, some people just really don’t like dirt under their fingernails. That’s totally fine.
Types of Garden Gloves
Cotton gloves – Lightweight, breathable. Not very protective. Light tasks such as weeding or harvesting only.
Leather gloves – Full strength for pushing through brambles and sharp edges. Ideal for rose pruning or handling rough materials.
Nitrile-coated gloves – Waterproof and provides good traction. Great for wet tasks and general gardening.
Rose gardening gloves – Long-cuff gloves offer extra protection against getting poked or scratched.
The Fit is More Important Than You Think
Oversized gloves are prone to slip off and hinder dexterity. Too tight and they’re torture, restricting movements of the hand.
The tips of your fingers should hit the end of each glove finger without any material bunching up. Your hand should be able to close into a fist with no difficulty.
My Recommendation for New Gardeners
Start with a pair of nitrile-coated gloves for everyday wear. They are $8 to $15 and will cover 80 percent of jobs in the garden.
Add a pair of leather gloves later if you grow roses or work with thorny plants.
Tool 4: Watering Can – It’s Better than a Garden Hose
“Why would I need a watering can when I have a hose?”
Great question.
Hoses supply too much water, too quickly. They scour seeds, expose roots and compact soil. For tender seedlings and pot plants, you can’t beat a watering can for control.
Choosing the Right Size
- Small (1-2 gallon) – Easy to carry when full, great for container plants
- Medium (2-3 gallon) – The best all-around size for most gardeners
- Large (3+ gallon) – Heavy when full but fewer trips required
Start with a 2-gallon can. It strikes the perfect balance.
Key Features to Consider
Removable rose – That’s the sprinkler head on the spout. Face it up for soft rain-like watering. Face it down for more direct water flow.
Long spout – Allows you to reach hanging baskets and the back of a garden bed without trampling on plants.
Balanced design – When the can is full, it should feel balanced, not like it’s tipping over.
Large mouth opening – For easy filling from faucet.
Metal vs. Plastic
| Material | Pros | Cons | Best For |
|---|---|---|---|
| Metal | Classic look, durable | Rusts if not dried properly, heavy | Permanent fixture |
| Plastic | Lightweight, rust-free, inexpensive | Can crack in cold weather, fades in sunlight | Beginners, budget-conscious |
Plastic comes out on top for the majority of new gardeners. Buy a UV-resistant one in a dark color, and it will last for years.
Tool 5: Garden Rake – Beyond the Leaves
You may think that rakes are only used to clean up leaves in the fall.
But a good garden rake does so much more. It will level soil, break up clumps, clear rocks, smooth seedbeds and spread mulch.
Two Types of Rakes
Leaf rake – Fan-shaped collection of flexible tines for picking up leaves and light debris.
Garden rake – Flat metal tines fixed to a solid head, designed for soil work.
Start with the garden rake (also known as a bow rake or level-head rake). Save the leaf rake for later.
What to Look For
Metal head with 14-16 tines – This is the workhorse that does most tasks.
Solid handle – Wood or fiberglass. The handle should be sturdy, not flimsy.
Proper length – Should reach about to your shoulder when standing upright.
Size Matters for Your Space
- Small garden and raised beds: 12-14 inch head
- Average garden: 16 inch head (standard size)
- Large garden: 18-24 inch head
A 16-inch garden rake costs between $20 and $40, and can last for decades with basic care.
Tool 6: Adjustable Nozzle Hose – Water Delivery System
You will water your garden hundreds of times a season.
This job is done much faster and better with a good hose and nozzle. Cheap hoses kink, leak and make you want to pull your hair out.
Hose Length Calculation
Calculate the distance from your water supply to the furthest point in your garden. Add 10 feet for flexibility.
Common lengths:
- 25 feet – Small patios and decks
- 50 feet – Average size suburban yards
- 75 feet – Larger properties
- 100 feet – Extensive gardens
Hose Material Options
- Vinyl – Least expensive but bends or kinks easily and will crack in cold ($10-20)
- Rubber – Sturdy, flexible and longest lasting ($30-60)
- Expandable – Lightweight when empty, expands with water pressure ($25-45)
If you’re a new gardener, you’ll get the best value for your money with a 50-foot rubber or heavy-duty vinyl hose.
The Nozzle Makes the Difference
Get an adjustable nozzle with multiple spray patterns:
- Jet – For cleaning tools and hard surfaces
- Shower – Gentle sprinkle for seedlings
- Flat – Wide spray ideal for lawn or wide area
- Mist – Tender plants & young transplants
Decent nozzles are $10-$25, and they come with a shut-off valve so you aren’t walking back to the faucet all of the time.
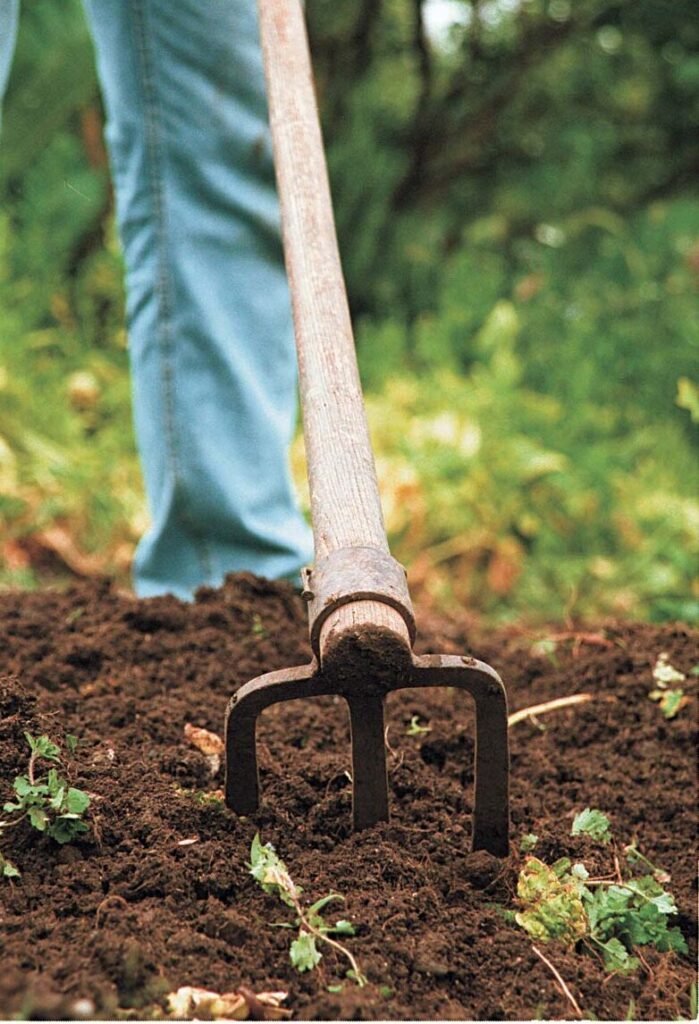
Tool 7: Garden Fork – The Soil Loosener
This four-pronged implement may look medieval, but it’s incredibly handy.
Garden forks loosen compacted soil without inverting it. They incorporate compost, dig for root vegetables and aerate heavy clay soil more effectively than a shovel.
Fork vs. Spade vs. Shovel
Garden Fork – Four solid tines, breaks up soil and turns compost
Spade – Flat blade great for edging and digging precise holes
Shovel – Curved blade, ideal for moving and transporting loose material
All perform a variety of functions, but the fork is probably most versatile for soil work.
Sizing Your Fork
Digging fork – Full-size tool with 4 flat tines about a foot long. For turning compost and breaking ground.
Border fork – Smaller and easier to maneuver for work in borders and raised beds.
Those with small gardens or less strength will appreciate the border fork. Otherwise, get the full-size digging fork.
What to Spend
Quality garden forks run $30-60. The joint between tines and handle is everything – which is where cheap forks fail. Look for solid construction without welded joints.
Tool 8: Wheelbarrow or Garden Cart – Your Hauling Helper
Hauling soil, compost, mulch and plants around the garden gets old quickly.
A wheeled cart is a spine-saving purchase.
Wheelbarrow vs. Garden Cart
| Feature | Wheelbarrow | Garden Cart |
|---|---|---|
| Wheels | 1 (front center) | 2 or 4 (more stable) |
| Maneuverability | Better in tight spaces | Easier on rough terrain |
| Dumping | Tip easily forward | Harder to dump |
| Stability | Requires balance | Stands alone |
| Weight capacity | 200-400 lbs | 400-800 lbs |
Beginners often opt for wheelbarrows, which are easier to dump and store.
Size Guidelines
- 3 cubic feet – Small gardens, light work
- 4-6 cubic feet – Average home gardening (general use)
- 7+ cubic feet – Large properties, heavy use
Get a 5-6 cubic foot wheelbarrow and you can handle 90% of your garden hauling.
Material Matters
Plastic tray – Lighter, won’t rust, easier to clean ($50-80)
Steel tray – More durable, higher load capacity, can rust ($70-120)
Pneumatic tire – Filled with air, smoothest ride, good on uneven ground
Solid tire – No flats but less cushioned
For beginners, it’s hard to beat a plastic tray with pneumatic tire for convenience and price.
Tool 9: Garden Hoe – The Weed Warrior
Weeds are every gardener’s enemy.
A garden hoe will allow you to cut through weeds right at ground level without bending your back. It also digs trenches for planting seeds and incorporates soil amendments.
This tool saves your back.
Types of Hoes Explained
Standard hoe – A flat blade oriented perpendicular to the handle. Great for chopping down weeds.
Stirrup hoe – Loop-shaped blade to cut weeds on push-pull action (best option)
Warren hoe – Pointed blade, perfect for creating planting furrows
Begin with a stirrup hoe (also known as a scuffle hoe). It is the easiest to use and most effective for weed control.
Proper Hoe Technique
Keep the blade parallel with the surface of the soil. Push and pull just under the surface. This slices through weed roots without harming your garden plants.
Sharp blades are more effective than dull ones. Sharpen your hoe once a month with a file.
Size and Handle Length
When you’re standing up straight, the hoe handle should come up somewhere between your chin and nose. This allows you to work comfortably without bending down.
- Basic quality hoe: $15-25
- Premium stirrup hoe: $35-60 with lifetime warranty
Tool 10: Kneeling Pad or Garden Seat – Save Your Knees
It may sound like a luxury, but it’s not.
Gardening involves lots of kneeling. Planting. Weeding. Harvesting low-growing crops. Your knees will hurt after an hour on hard ground.
You can buy a simple foam pad for $10-$15 and make your gardening days way more comfortable.
Basic Kneeling Pad Options
Foam pad – Simple, inexpensive, portable ($8-15)
Gel pad – Extra padding; longer lasting ($20-30)
Kneeling bench – Handle bars to assist you in getting up and flips over into a seat ($40-80)
Best for most people: Basic foam pad. Buy the kneeling bench if you have bad knees or limited mobility.
Features Worth Considering
- Waterproof coating – Keeps you dry when kneeling on damp ground
- Carrying handle – Convenient to move around the garden
- Bright color – Won’t get lost in the garden
- Storage pockets – Store small tools and seed packets
Where to Use It
Store the kneeler near the garden gate. You’ll grab it on your way to work.
Use it while weeding, transplanting and doing any ground-level work. Your knees will notice the difference right away.
How To Build Your Tool Kit Without Going Broke
So those are the must-have home gardening tools for beginners.
Here’s the smart way to buy them.
The Priority System
Month 1 – The Essentials ($70-100)
- Hand trowel
- Garden gloves
- Watering can
- Bypass pruners
Month 2-3 – Mid-Priority Items ($100-150)
- Garden hose with nozzle
- Garden rake
- Kneeling pad
Month 4+ – Expansion Tools ($150-250)
- Garden fork
- Wheelbarrow or cart
- Garden hoe
Space out your purchases over a few months. This spreads the cost out and allows you to learn what tools you really need.
Money-Saving Tips
- Shop off-season – Late fall and winter are great times to buy garden tools on sale
- Watch for estate sales – Good vintage tools often outlast new cheap tools
- Join tool libraries – Some areas have library systems that let you borrow tools
- Begin with the basics – Don’t purchase specialized tools until you know you need them
Storage and Maintenance
Clean tools after each use. Wipe off dirt and moisture.
Oil metal parts to prevent rust.
Store tools in a dry place. Hang them on a pegboard or place in a bin.
Sharper tools are more effective and safer. Sharpen blades regularly.
| Tool | Maintenance Required | How Often |
|---|---|---|
| Trowel | Wipe clean, oil blade | After each use |
| Pruners | Clean sap off, oil pivot | Weekly during season |
| Garden fork | Remove soil, check handle | After each use |
| Hoe | Sharpen blade, check handle | Monthly |
| Wheelbarrow | Inflate tire, oil wheel | Monthly |
Good Tools Save Money in the Long Run
Cheap tools break quickly.
You throw them away and buy more. And they frustrate you the entire time you’re using them!
Good tools cost more upfront but will last a lifetime. Most professional gardeners use the same tools for 20 to 30 years.
Do the math:
- Cheap trowel: $5 × 5 replacements over 10 years = $25 total
- Quality trowel: $20 × 1 purchase = $20
The quality tool costs less and works better the whole time.
How to Spot Quality Tools
- Weight – Good tools have weight to them. They shouldn’t feel flimsy
- Joints – All joints should be solid, not loose or wobbly
- Construction – Solid stainless or carbon steel, not thin stamped metal
- Warranty – Great brands offer guarantees on their products
- Brand reputation – Research reviews before buying expensive tools
Start Simple, Grow Your Collection
Not every tool is necessary on day one.
Begin with the essentials: trowel, gloves, watering can and pruners. These handle most beginner tasks.
You can always add tools as you discover what sort of gardening you enjoy. Growing vegetables requires different tools than flower gardening does. Container gardening needs significantly less equipment than in-ground beds.
Let the needs of your garden determine what tools you buy.
The most important investment new gardeners can make is in quality tools that last seasons and seasons of productive growing. Buy thoughtfully, take care of them and they can serve you for decades.
Your perfect garden is waiting. Now you know exactly what tools you need to create it.
For more information on selecting and maintaining garden tools, visit the National Gardening Association’s tool guide.
Frequently Asked Questions
Q: Do I really need all 10 of these tools to begin gardening?
A: No. Start with the first four items (trowel, pruners, gloves, watering can) for about $50-70. Add other tools as you determine what your garden really requires. Most gardeners work with only 5-6 key tools.
Q: How much does it cost to have all these basic gardening tools?
A: You should expect to pay $300-500 for good versions of everything on this list. On the budget end it’s $150-250, and on the high end premium tools can cost more. Spreading those purchases over several months makes it more manageable.
Q: Can I use kitchen or household scissors in place of garden pruners?
A: Kitchen shears are not made to cut woody stems, and they will either become dull or break soon. Garden pruners provide cleaner cuts that help plants recover more quickly. The cost ($15-25) is worth it for your plants’ health.
Q: Should I purchase tools online or in a store?
A: Physical stores let you handle tools and check their weight and quality before purchasing. But online shopping has better pricing and selection. When possible, try out tools in-store before researching the best price online.
Q: How do I store my gardening tools in the winter?
A: Clean all tools thoroughly so no dirt or plant materials remain. Dry completely and apply a thin coat of oil to metal parts. Store in a dry location. Inspect wooden handles and sand off any splinters. Sharpen blades before storing.
Q: Are expensive tools better than store brands?
A: Not always. Some store brands offer high quality at lower cost. But you usually pay for better materials and warranties with established brands. Read reviews and examine the actual tool construction, not just the brand name.
Q: Can left-handed gardeners work with regular tools?
A: Most basic tools work for both left and right-handed gardeners, as they’re generally ambidextrous. However, some pruners come in left-handed models. If a tool feels uncomfortable in your hand, search for ambidextrous or left-handed options.
Q: What tools do I need for container gardening?
A: Container gardening needs fewer tools. Stick with a hand trowel, small pruners, watering can and gloves. You won’t require large tools such as forks, rakes or wheelbarrows unless you have many containers to work with..