
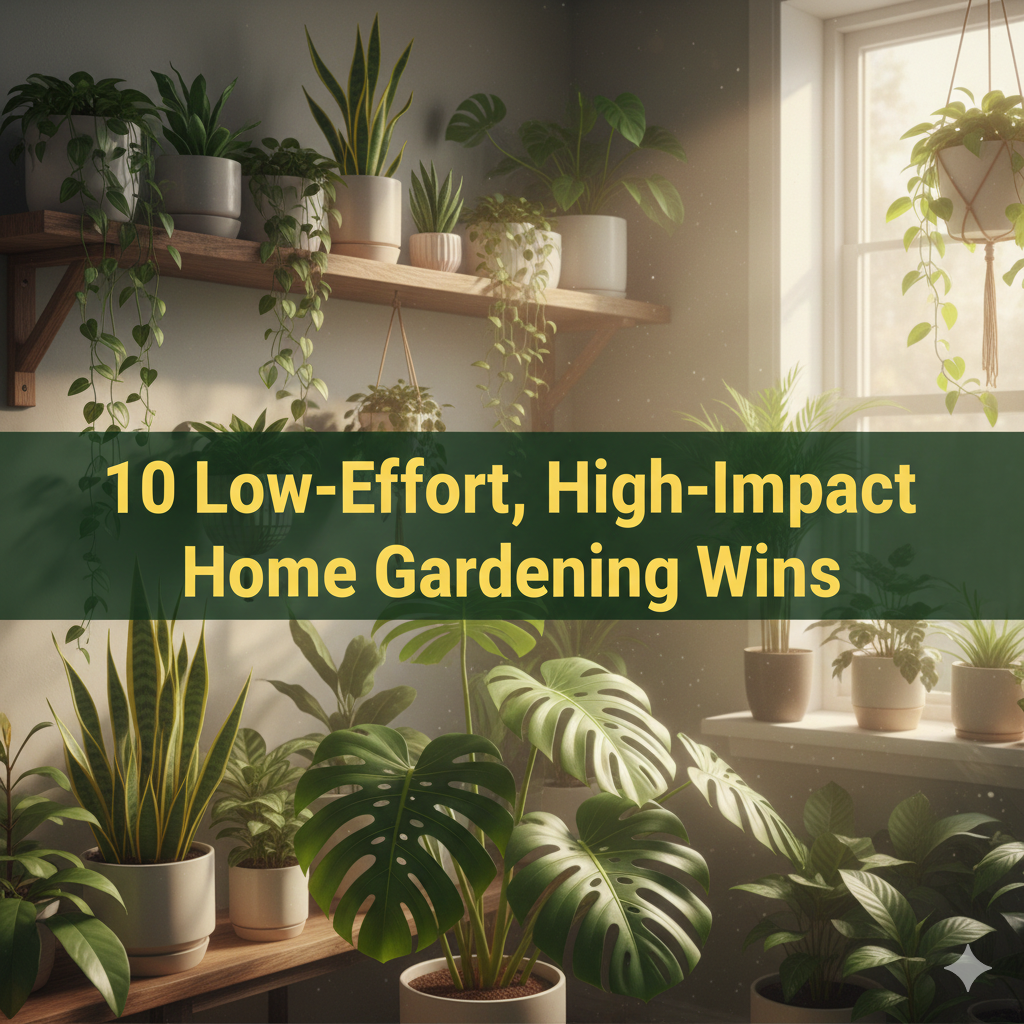
10 Low-Effort, High-Impact Home Gardening Wins
Introduction
Now envision this: stepping into your backyard or onto a balcony and picking the basil for tonight’s pasta. You scoop up a handful of cherry tomatoes that have nothing to do with the tasteless ones from the supermarket. Every time that your neighbors walk by, they compliment you on your beautiful flowers.
This is not a fantasy for the decades-experienced or the wealthy or large outdoor lot-holders. Home gardening has some instant wins that make you feel good about it from the get-go. They’re the mini victories that keep you going and show you don’t need a degree in botany to grow things.
People are afraid of not knowing what to do, or they believe it will take too much time. The fact is, some kinds of gardening projects are almost guaranteed to succeed. They’re forgiving when you neglect to water them. They grow quickly enough to hold your interest. They generate actionable results.
This guide to 10 easy gardening wins is full of satisfying tips that won’t require you to spend your entire weekend on all fours in the dirt. Each one instills you with confidence and adds something of value to your life, like fresh food, pretty blooms or a relaxing outdoor space you might actually want to spend time in.
Plant Fresh Herbs on Your Kitchen Windowsill
There’s nothing nicer than snipping fresh herbs as you cook. A windowsill herb garden is a way to get restaurant-quality ingredients without ever leaving your home.
Which Herbs Work Best Indoors
Basil, parsley, cilantro, mint and chives all grow well in a sunny windowsill. Best of all, these herbs can endure the rigors of indoor life better than their plant peers and grow fast enough that you’ll be able to harvest within weeks.
Basil is worth singling out because it’s always growing so lustily in sunny locations. One plant can supply leaves for several meals a week. You should be pinching off the top leaves regularly to allow for bushier growth.
Mint is so exuberant that it does better in pots than in a garden bed, where it tends to spread. The new leaves make fantastic tea and bring a shot of bright flavor to summer drinks.
Setting Up Your Windowsill Garden
Use pots that have drainage holes to avoid root rot. Fill them with potting soil, not garden dirt. Garden soil is too dense for pots and can drown roots.
Use the sunniest window to put your herbs on that you have available (ideally 6+ hours of direct light). Most homes will benefit from windows that face south. If your windows don’t receive enough sunlight, add a little grow light (they cost around $20-30 each) and you’ll be golden.
Water when the surface inch of soil feels dry to your finger. Indoor herbs should be watered 2-3 times a week. Do not strictly adhere to a schedule, as indoor temperatures and humidity alter the rate at which soil dries.
Start a Simple Compost Bin
Composting transforms kitchen scraps into black gold for your garden. This victory both saves you money on fertilizer and reduces the trash shipped to landfills.
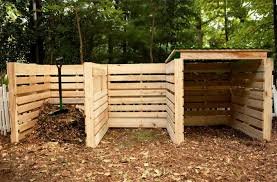
Choose Your Composting Method
Outdoor bins are fine if you have outside space. Buy a tumbler composter ($80 to $150) or make your own single-bin composter with wooden pallets ($20). Tumblers can make turning compost simpler, but aren’t necessary.
Dwellers of apartments may consider vermicomposting using red wiggler worms in a small bin. These organisms thrive in the home beneath kitchen sinks or out on a balcony, breaking down organic waste with virtually no odor or mess if properly maintained.
What Goes In Your Compost
| Green Materials (Nitrogen) | Brown Materials (Carbon) |
|---|---|
| Vegetable peels | Shredded newspaper |
| Fruit scraps | Cardboard pieces |
| Coffee grounds | Dry leaves |
| Fresh grass clippings | Straw or hay |
| Eggshells | Wood chips |
Making Composting Foolproof
Alternate greens and browns in approximately equal proportions. Too much green stuff makes slimy, stinky compost. Too much brown and decomposition slows down.
Keep your compost as damp as a wrung-out sponge. If it seems dry and dusty, add water. Stir in dry leaves or shredded paper if it gets soggy.
Turn or blend your pile once a week or every other week to mix in some oxygen. Air is required by the bacteria for efficient decomposition of materials. In warm weather, completed compost is ready in 4-8 weeks. Colder seasons require a bit more time, but are still effective.
Cherry Tomato Plants for Surefire Harvests
Cherry tomato plants succeed for more beginning gardeners than any other vegetable. They bear heavily, forgive small errors and are delicious straight off the vine.
Why Cherry Tomatoes Always Win
These plants come into fruit approximately 60 days after transplant, and then produce until fall frost kills them. Per plant, over 100 tomatoes will be produced during the summer. The continual harvest makes you excited about gardening.
Cherry tomatoes have better disease resistance than large slicing tomatoes. They tolerate heat stress with a bit more grace. Even if you forget to water them for a day or two, they recover without losing all their blooms.
The taste differential between homegrown and store-bought is colossal. The tomatoes in the average produce section are bred for shipping, not tasting. Your tomatoes will taste sweeter, smell more fragrant, and be something you actually want to eat.
Growing Tips That Guarantee Results
Plant cherry tomatoes in locations with sun for 6-8 hours. The less light, the fewer tomatoes and weaker plants.
Support plants with cages or stakes as they grow tall. Without support, plants spread on the ground as fruit flattens against soil and rots. Put in supports at planting time to avoid disturbing roots later.
Deep-water twice a week; do not water lightly every day. Deep watering prompts roots to extend down into soil that retains moisture longer. Irregular watering causes fruit to crack or have a hard skin.
Fertilize plants once every 2-3 weeks with tomato food or compost. The heavy fruit production depletes the ground of its nutrients more quickly than for most plants.
Create a Pollinator-Friendly Flower Patch
Flowers that attract bees and butterflies breathe life into your garden, and they help the environment, too. This victory needs little care after it’s planted.
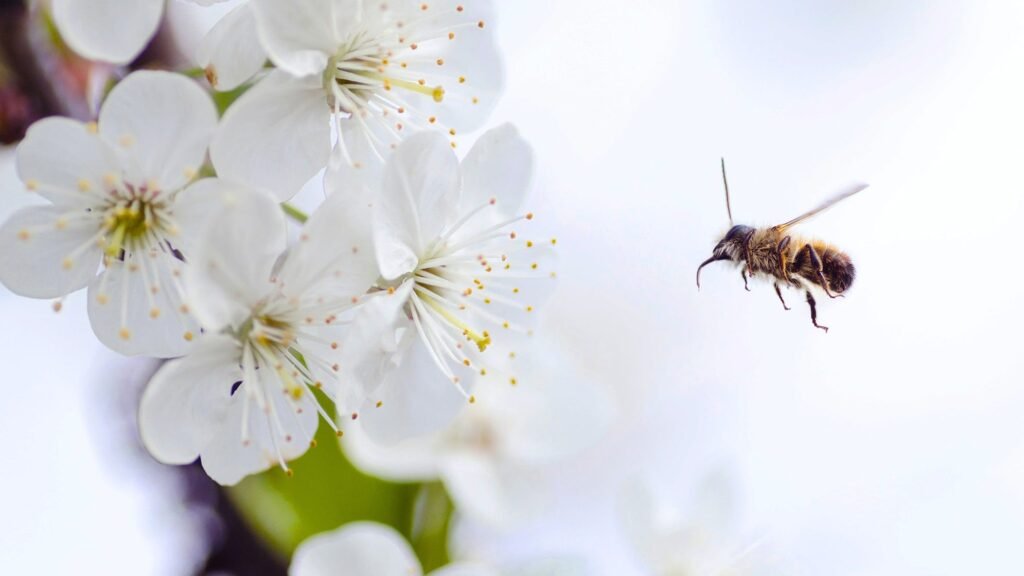
Best Flowers for Pollinators
Zinnias, sunflowers, marigolds and cosmos bring beneficial insects to the party and look good doing it. These annual flowers bloom continuously from summer through fall with almost no care.
Zinnias come in every color you can imagine, and the more frequently you cut them for bouquets, the more flowers they produce. Once established, they are super drought and heat tolerant.
Sunflowers offer big, dramatic focal points and provide seeds for birds in fall. Dwarf varieties work perfectly in small spaces while giant varieties can grow up to 8-12 feet tall.
How to Plant and Care for Your Flower Patch
Sow seeds directly into the garden after your region’s last frost date. Scatter seeds over prepared soil, cover lightly and water gently. Most flowers germinate within 7-10 days.
Thin seedlings to the spacing recommended on seed packets. Crowded plants compete for resources and produce fewer flowers.
Deadhead spent blooms by clipping or pinching them off. This simple job tricks plants into producing more flowers instead of seed. Enjoy double the number of blooms with this 5-minute weekly task.
These flowers aren’t typically in need of fertilizer if they are planted in good soil. Water during prolonged dry periods, but otherwise rely on rain for irrigation. The ease of upkeep makes this gardening win ideal for busy people.
Grow Lettuce for Month-Long Harvests
Fresh greens from the garden taste so much better than bagged lettuce from stores. Lettuce is a fast crop and you will be harvesting your first leaves in 3-4 weeks.
Choosing the Right Lettuce Varieties
Leaf lettuce, such as Red Sails, Oak Leaf and Buttercrunch, continues to produce when you harvest outer leaves. The center continues producing new leaves for weeks.
The first time, stay away from head lettuce like iceberg. Head lettuces are slower to mature, and you harvest the whole plant rather than picking individual leaves.
Mesclun mixes include a variety of lettuce types and other greens. Sow the small seeds thickly and snip baby greens with scissors when 3 to 4 inches tall.
Growing Perfect Lettuce
Sow lettuce in early spring or fall while temperatures remain below 75°F. Hot weather causes the leaves to turn bitter and the plants to bolt (go to seed prematurely).
Lettuce will tolerate partial shade better than most other vegetables. In warm climates, afternoon shade actually helps plants produce longer.
Soil should be kept evenly moist as lettuce has a shallow root system. Dry soil produces tough, bitter leaves. Mulch helps to even out moisture levels.
Harvest the outer leaves when they reach usable size, allowing the center to continue producing. Most varieties provide fresh greens for 4-6 weeks before needing replacement.
Install a Rain Barrel for Free Garden Water
Rainwater collection saves money on water bills and delivers better water for plants than chlorinated tap water. This is a one-time setup that gives you ongoing benefits.
Setting Up Your Rain Barrel System
Buy a food-grade barrel, or repurpose a large container. 55-gallon drums work perfectly and can cost as little as $20-40 at farm supply stores.
Position the barrel beneath a downspout from your roof gutters. Cut the downspout and attach a diverter that sends water into the barrel. Install an overflow hose to direct excess water away from your foundation.
Add a spigot near the bottom for easy water access. Elevate the barrel on cinder blocks to create gravity-fed pressure for filling watering cans.
Rain Barrel Benefits
Water Collection Comparison:
| Rainfall Amount | Roof Area (1000 sq ft) | Water Collected |
|---|---|---|
| 0.25 inches | 1000 sq ft | 156 gallons |
| 0.5 inches | 1000 sq ft | 312 gallons |
| 1 inch | 1000 sq ft | 623 gallons |
Barrels fill quickly even with modest rainfall. Most households can collect hundreds of gallons during rainy seasons, significantly reducing irrigation costs.
Rainwater lacks the chlorine and fluoride found in municipal water. Plants grow better with rainwater because it contains natural minerals washed from the atmosphere.
Try Square Foot Gardening in Raised Beds
Square foot gardening maximizes production in minimal space using a grid system that makes planning effortless. This method suits beginners because it eliminates most guesswork.
Building Your Square Foot Garden
Construct a 4×4 foot raised bed using untreated lumber. This size allows you to reach the center from any side without stepping on soil. Fill it with a mix of 1/3 peat moss or coconut coir, 1/3 vermiculite, and 1/3 blended compost.
Divide the bed into 16 squares using string or thin wood strips. Each square foot becomes a planting section for specific crops based on their mature size.
Planting Guide Per Square:
- 1 plant per square: Tomatoes, peppers, cabbage
- 4 plants per square: Lettuce, chard, marigolds
- 9 plants per square: Spinach, beets, bush beans
- 16 plants per square: Radishes, carrots, onions
Why This Method Creates Easy Wins
The intensive planting leaves no room for weeds. Plants grow so close together that they shade out weed seeds before they can establish.
The defined squares make planning simple. You know exactly where everything goes and how many plants fit in each section.
Raised beds drain better than ground-level gardens and warm faster in spring. You can start planting 2-3 weeks earlier than traditional gardens in the same climate.
The compact design requires less water and fertilizer than sprawling gardens. Everything stays within arm’s reach for easy maintenance and harvesting.
For more gardening tips and resources, explore helpful guides to enhance your growing success.
Propagate Plants from Cuttings
Growing new plants from cuttings feels like magic and costs nothing. This skill multiplies your garden for free while giving you plants to share with friends.
Easiest Plants to Propagate
Pothos, spider plants, basil, mint and coleus root so easily that they practically do it themselves. These plants develop roots in plain water sitting on a windowsill.
Basil cuttings root within 7-10 days. Snip 4-6 inch stems just below a leaf node, remove the bottom leaves, and place in water. Change water every few days. When roots reach 1-2 inches long, transplant into soil.
Spider plants produce baby plantlets on long stems. Clip these babies off and root them in water or plant directly in soil. Each mother plant creates dozens of offspring annually.
Step-by-Step Propagation Process
Take cuttings in morning when plants hold maximum moisture. Use clean, sharp scissors to make cuts just below a leaf node where growth hormones concentrate.
Strip leaves from the bottom 2 inches of each cutting. Submerged leaves rot and contaminate water.
Place cuttings in clear containers so you can watch roots develop. Keep them in bright, indirect light. Direct sun overheats water and damages tender new roots.
Once roots reach 1-2 inches long, transition plants to small pots with potting soil. Water gently and keep in shade for a few days while they adjust.
Build a Simple Strawberry Tower
Vertical strawberry planters produce impressive harvests in tiny spaces while creating attractive garden features. These towers work perfectly on patios, balconies, or small yards.
Constructing Your Strawberry Tower
Stack terracotta pots in graduating sizes from largest to smallest. Fill each pot with potting mix and plant strawberries around the edges where they cascade over the sides.
Alternatively, use a 5-gallon bucket. Drill 2-inch holes around the sides in a spiral pattern. Fill with soil and plant strawberries in each hole plus several on top.
PVC pipe towers work well for permanent installations. Cut holes in a 6-inch diameter pipe, fill with growing medium, and plant strawberries in the openings.
Growing Strawberries Vertically
Choose everbearing or day-neutral strawberry varieties that produce fruit continuously rather than one big crop. Albion, Seascape, and Tristar work excellently in containers.
Water towers from the top and let water trickle down through all levels. Check moisture daily during hot weather since containers dry out quickly.
Feed every 2 weeks with diluted liquid fertilizer. Fruit production demands significant nutrients that get depleted in the limited soil volume.
Expect berries to ripen 60-90 days after planting. One tower with 15-20 plants can produce several quarts of fruit throughout summer and fall.
Create a No-Dig Lasagna Garden
Lasagna gardening builds fertile planting beds without back-breaking digging or tilling. Layer organic materials directly over grass or weeds and let nature do the work.
Layering Your Lasagna Garden
Start with cardboard or thick newspaper to smother existing vegetation. Overlap sheets to prevent gaps where weeds could emerge.
Add a 4-inch layer of brown material like shredded leaves, straw, or wood chips. Follow with a 4-inch layer of green material such as grass clippings, kitchen scraps, or coffee grounds.
Continue alternating brown and green layers until the pile reaches 18-24 inches tall. Top with 2-3 inches of finished compost or quality topsoil for immediate planting.
Benefits of No-Dig Gardening
The layers decompose into rich, fluffy soil over several months. Worms and beneficial microorganisms move in naturally, aerating soil without mechanical tilling.
You can plant immediately in the top compost layer while lower layers continue breaking down. Root vegetables and seeds should wait until the following season when decomposition completes.
This method eliminates digging while improving soil faster than traditional methods. The diverse organic materials create balanced nutrition that commercial fertilizers can’t match.
No-dig beds require less watering since organic matter retains moisture exceptionally well. The decomposing layers generate slight heat that extends the growing season.
FAQs About Easy Home Gardening Wins
What gardening project gives the fastest results for beginners?
Growing lettuce or radishes from seed provides the quickest gratification. Both vegetables germinate within days and reach harvest size in 25-30 days. Herbs from cuttings root visibly within a week, offering near-instant success that builds confidence.
How much money do I need to start getting gardening wins?
You can begin with $20-50 for basic supplies like seeds, potting soil, and a few containers. Many wins like composting or propagating plants cost virtually nothing. Start small with 2-3 projects and expand as you discover what you enjoy.
Do I need a yard to experience these gardening wins?
Absolutely not. Windowsill herbs, container vegetables, and vertical gardens work perfectly on balconies or patios. Several wins like propagation and composting require only counter space or a small corner. Urban gardening delivers the same satisfaction as traditional yards.
Which win should I start with if I have limited time?
Windowsill herbs offer maximum reward for minimal time investment. They need checking only 2-3 times weekly and provide immediate culinary benefits. Cherry tomatoes in containers come second, requiring slightly more attention but producing impressive harvests.
Can I pursue multiple gardening wins simultaneously?
Yes, and this actually works well. Start a compost bin while growing windowsill herbs. Plant lettuce and cherry tomatoes together. Combining projects creates a more complete garden experience without overwhelming you, since different plants need attention at different times.
What if my first attempt at a gardening win fails?
Failure teaches more than success in gardening. Analyze what went wrong, adjust your approach, and try again. Most “failures” result from simple fixes like watering adjustments or better sun exposure. Every experienced gardener has killed countless plants while learning.
Conclusion
These 10 easy home gardening wins prove that you don’t need years of experience or a green thumb to grow successfully. Each project delivers tangible results that make you feel accomplished and eager to try more.
Start with wins that match your space and interests. Apartment dwellers might begin with windowsill herbs and propagation projects. Homeowners with yards could jump into raised beds and rain barrels. The beauty of these wins is that they all work independently or combine into a complete gardening system.
Remember that gardening shouldn’t feel like a chore or a source of stress. These wins succeed because they’re forgiving, produce visible results quickly, and provide real value to your life. Fresh herbs improve your cooking. Homegrown tomatoes taste better than anything from stores. Composting reduces waste while enriching your soil. Pollinator flowers support the environment while beautifying your space.
Don’t wait for the perfect moment or worry about making mistakes. Pick one win from this list and start this weekend. The satisfaction you’ll feel when harvesting your first tomato, snipping fresh basil, or watching cuttings develop roots will hook you on gardening for life.
Your garden journey doesn’t require perfection. It needs only curiosity and willingness to get your hands dirty. These easy wins make that journey rewarding from day one.