
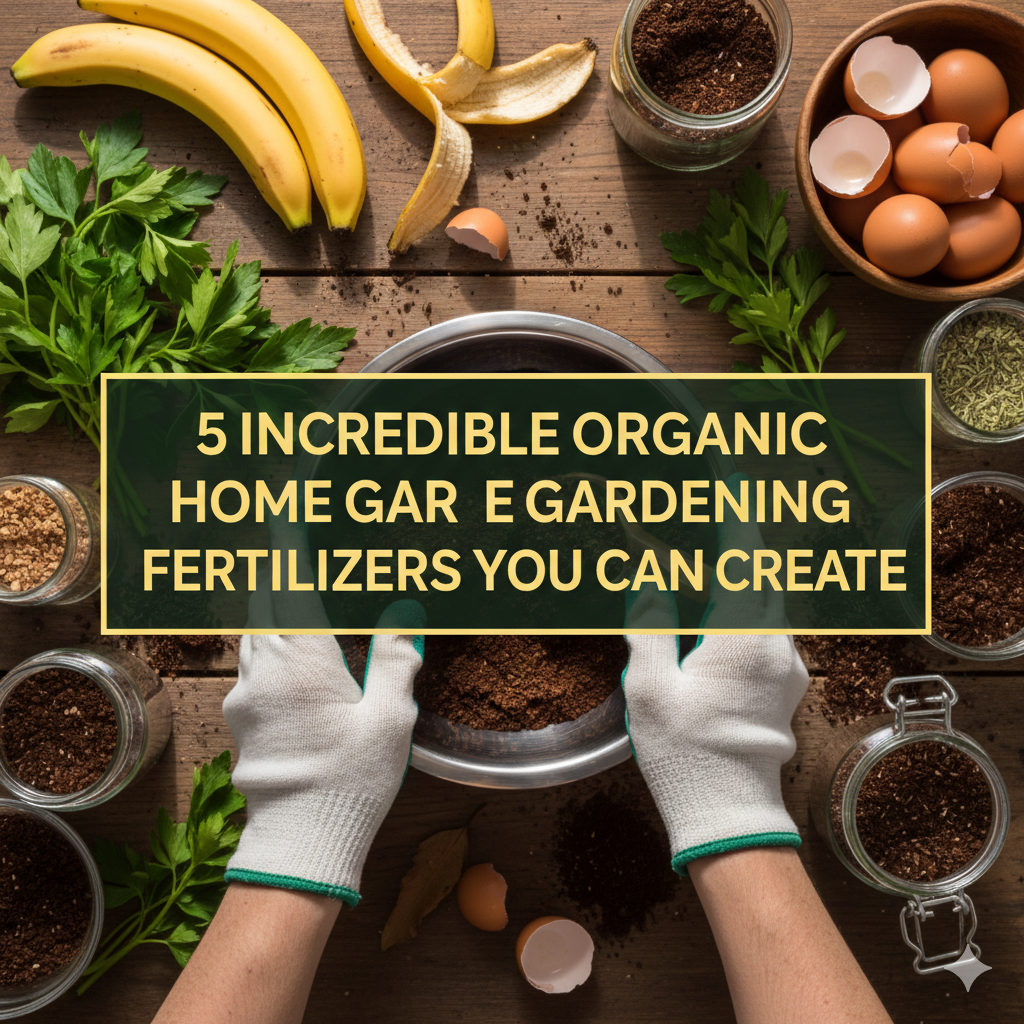
5 Incredible Organic Home Gardening Fertilizers You Can Create
Feed Your Garden Without Breaking the Bank
Step into any garden center and see shelves filled with overpriced fertilizers. Bottles and bags and boxes pledging miraculous results. The price tags may even leave your wallet hurting.
But here’s a secret most folks who grow plants don’t know: your kitchen is putting out powerful fertilizers every single day. It’s likely you are throwing out materials that could make your plants thrive.
Homemade organic fertilizers are as effective as store-bought. Sometimes they work even better. They’re from natural ingredients your plants know how to respond to and can absorb well.
The best part? To make these fertilizers costs nearly nothing. And you will use things from home. Vegetable scraps, coffee grounds, eggshells and other “waste” turn to garden gold.
This guide lets you know five good organic fertilizers for DIY enthusiasts. Each recipe is easy, powerful and totally natural. Your plants will be stronger, bear more and remain healthy.
No chemistry degree needed. No complicated equipment required. No fuss, no complexity — just simple ingredients and simple steps.
Why not put your kitchen waste to work as plant food?
The Many Ways Homemade Organic Fertilizers Are Better Than Store-Bought Ones
Before I give you the recipes, let’s talk about why making your own fertilizers is a good idea.
Save serious money. Fertilizers available at the store can run $15-40 per bottle or bag. The homemade versions are pennies or even free.
Know exactly what you’re using. Store-bought fertilizers contain mystery ingredients. Homemade recipes just have what you put in. No hidden chemicals or fillers.
Reduce waste dramatically. Kitchen waste is turned into resources, not garbage. You will send less to the landfills while feeding your garden.
Improve soil health long-term. Chemical fertilizers feed the plants and starve the soil. Organic fertilizers nourish not only plants, but also the beneficial microorganisms in soil.
Avoid chemical buildup. Synthetics can build up salts that harm soil over time. Organic ones actually enrich the soil every time you use them.
Create custom blends. Different plants need different nutrients. When you make your own fertilizers, you can tailor the recipes to meet specific needs.
Feel good about sustainability. Turning kitchen waste into fertilizer closes the loop. It turns out: It takes gardening to save the planet.
How Plant Nutrition Actually Works
Plants require three primary nutrients, and a few secondary ones.
Nitrogen (N) encourages green growth of leaves. It’s important for stems, leaves and overall size of the plant. Plants that don’t get enough nitrogen turn yellow and remain small.
Phosphorus (P) contributes to rooting and flowering. It encourages plants to form blooms, fruits and seeds. Without sufficient phosphorus, plants have difficulty flowering.
Potassium (K) gives plants power and energy. It also enhances resistance to disease, drought tolerance, and fruit quality. Lack of potassium results in weak stems and reduced production.
These three elements are known as macronutrients, because plants take up large quantities of them. You can find three numbers — such as 10-10-10 — on fertilizer labels. These represent N-P-K percentages.
Secondary nutrients include calcium, magnesium and sulfur. Small amounts are required by plants.
Micronutrients such as iron, zinc and boron are required in minute quantities. But they’re still essential for the health of plants.
Organic fertilizer is often a bit richer in nutrients than synthetics. They release slowly, so they can help put an end to the feast-or-famine cycle of chemical fertilizers.
Fertilizer #1: Compost Tea – Liquid Gold for Plants
Compost tea is what it sounds like: water brewed with nutrients from compost. It’s among the best fertilizers you can make.
What Compost Tea Does That Is So Effective
Imagine compost tea as a protein shake for plants. It is full of good bacteria, fungus and nutrients that are instantly food for the plants.
Unlike solid compost, tea is in liquid form. It is quickly absorbed by plants via roots and leaves. Results are often visible within days.
Compost tea also inoculates your soil with beneficial microorganisms. These little helpers decompose organic matter and help to immunize plants against disease.
How to Make Compost Tea
What you need:
- 1 gallon of water (it would be best if it is non-chlorinated)
- 2 cups of finished compost
- 1 tablespoon unsulfured molasses (nourishes beneficial bacteria)
- Large bucket or container
- Cloth or mesh bag
- Pump and air stone for aquarium (optional but recommended)
Step-by-step instructions:
Step 1: Fill your bucket with water. If tapping into waterline, allow to sit overnight so chlorine will evaporate. Chlorine kills that good bacteria you need.
Step 2: Put your compost in a cloth bag or old pillowcase. Tie it closed. This creates a “tea bag” that you can easily take out later.
Step 3: Immerse the bag of compost in water. Add molasses. The molasses provides nutrition for beneficial bacteria and encourages it to multiply.
Step 4: If you have a fish tank pump, put in the air stone and turn it on. This way, aeration maintains the life and multiplication of good bacteria. Without aeration, your tea may go anaerobic (the bad bacteria take over).
Step 5: Allow to brew for 24-48 hours. If not using a pump, stir occasionally. The water should become brown like tea.
Step 6: Dispose of compost bag. Squeeze out the excess into the bucket. Refill your compost pile or garden with the used compost.
Step 7: Serve tea at once for optimal results. After a few hours, beneficial bacteria begin to die off.
How to Apply Compost Tea
As a soil drench: Water plants with tea. Saturate the root zone. Use 1 to 2 cups per plant, depending on size.
As a foliar spray: Dilute tea 1:1 with water. Directly spray it on leaves early in the morning or in the evening. Never spray in hot sun.
Frequency: In the growing season use compost tea every 2-4 weeks.
What Compost Tea Provides
This fertilizer delivers a complete nutrient package:
- Nitrogen for leafy growth
- Phosphorus for roots and flowers
- Potassium for overall health
- Beneficial microorganisms
- Micronutrients from diverse compost materials
Fertilizer #2: Banana Peel Fertilizer – The Potassium Powerhouse
Potassium-rich fertilizer doesn’t get any easier than this — a banana peel. Don’t toss them; they can be turned into plant food.
Why Banana Peels Work Wonders
Potassium comes to a head as bananas ripen. Even after you’ve eaten the fruit, the peel retains much of this valuable nutrient.
Potassium strengthens plant cell walls. It also enhances disease resistance and the ability of plants to cope with stress. Flowering and fruiting plants, in particular, can use some additional potassium!
And banana peels also have trace amounts of nitrogen, phosphorus, calcium and magnesium. It’s an all-around fertilizing package in the form of a small, convenient package.
Three Uses for Banana Peels
Method 1: Banana Peel Water
Fastest for busy gardeners.
Ingredients:
- 4-5 banana peels
- 1 liter of water
- Glass jar with lid
Instructions:
Finely mince banana peels. Place them in the jar. Fill with water. Seal the jar and let it sit for 48 hours at room temperature. Fish out the peels (add to compost). Mix the banana water 1:5 with normal water. Use to pour water around the base of plants.
Apply once every two weeks during flowering and fruiting stages.
Method 2: Dried Banana Peel Powder
And since it’s concentrated, this product stores well for long-term nutrition.
What you need:
- Banana peels (as many as possible)
- Baking sheet
- Blender or food processor
Steps:
Freeze peels, stacking them up until you have a good number. Lay frozen peels out on a baking sheet. Place in oven and bake for 2-3 hours at 200°F (93°C) until totally dry and brittle. Let cool completely. The dry peels are then ground in a blender to a fine powder. Place powder in an airtight container.
How to use: Dust 1-2 tablespoons of powder around each plant and lightly work into the top inch of soil. Water thoroughly. Repeat monthly during growing season.
Method 3: Direct Burial
The easiest, and least amount of work to prepare.
All you need to do is cut fresh banana peels into small pieces. Plant them 2-3 inches deep near plant roots. Water the area well. The peels will decompose over the course of a few weeks, gradually feeding the soil.
It’s an amazing technique for tomatoes, peppers and roses.
What Banana Peel Fertilizer Provides
| Nutrient | Benefit to Plants |
|---|---|
| Potassium | Stronger stems, better flowering, improved fruit quality |
| Phosphorus | Root development, flower and fruit production |
| Calcium | Cell wall strength, disease resistance |
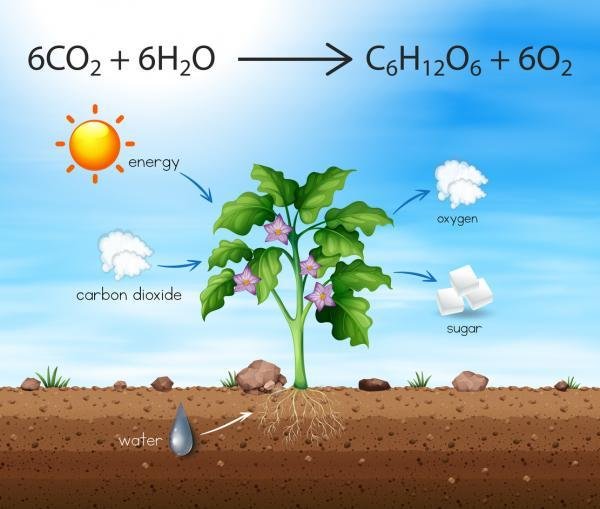
| Magnesium | Chlorophyll production, photosynthesis |
| Sodium | Water regulation (in small amounts) |
Fertilizer #3: Eggshell Powder – Calcium for Plant Health
Eggshells are composed almost entirely of calcium carbonate. They’re ideal for plants that require additional calcium.
The Calcium Connection
They’re not just for strong bones in humans; plants need them, too. It builds up cell walls and enables plants to fend off diseases.
Tomatoes, peppers and squash all particularly enjoy calcium. It stops blossom end rot, a perennial problem in which fruits turn black and become sunken on the bottom.
Soil needs calcium; it helps to neutralize soil’s acidity and as a result, increases nutrient absorption.
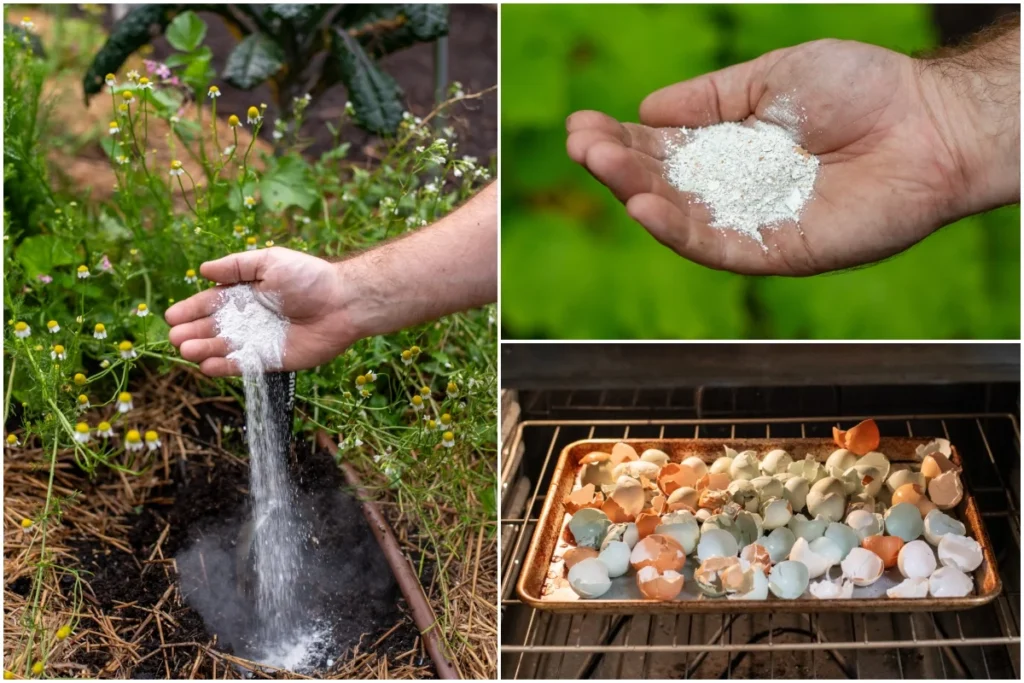
Making Eggshell Fertilizer
Collection and preparation:
Keep eggshells used in cooking or baking. Give them a wash in cold water to remove any egg residue. This prevents odors and pests. Let shells dry completely. You can hasten this along by putting them in a 200°F oven for about 10 minutes.
Collect dried eggshells in a container until you have enough.
Creating the powder:
Method 1 – Mortar and Pestle: Grind dried shells to a fine powder. That takes time but no special equipment.
Method 2 – Blender: Grind the dried shells in a blender or food processor until they make a fine powder. This is MUCH faster for large batches.
Method 3 – Rolling Pin: In a sealed plastic bag, place shells. Crush with a rolling pin. Keeps mess contained.
The finer the powder is, the more quickly plants can absorb it. It takes months for the coarser pieces to decompose.
Application Methods
Soil amendment: Add 1/4 cup eggshell powder to each square foot of garden space and mix into the soil before planting. Incorporate into top 6 inches of soil.
Side dressing: Sprinkle around established plants (2 tablespoons). Gently scratch into soil surface. Water well.
Transplant booster: Add 1 tablespoon of powder in each planting hole when transplanting seedlings.
Compost addition: Include crushed shells to your compost heap. They’ll eventually break down and contribute calcium to finished compost.
Eggshell Tea – Fast-Acting Calcium
For faster results, brew eggshell tea.
Boil a gallon of water with 10-12 crushed eggshells. Let it simmer for a couple of minutes. Take off heat and allow to steep overnight. Strain out shell pieces. Use the water, which is high in calcium content, to water your plants.
Use of calcium immediately is facilitated with this approach, rather than powder.
Plants That Love Eggshell Fertilizer
- Tomatoes (prevents blossom end rot)
- Peppers (stronger fruits)
- Squash and zucchini
- Broccoli and cauliflower
- Roses (produces stronger blooms)
- Apple trees
Fertilizer #4: Coffee Grounds – Nitrogen Booster and Soil Builder
Coffee grounds belong in the garden. They provide nitrogen and help the soil structure.
Coffee’s Garden Benefits
Fresh coffee grounds are 2% nitrogen. After brewing, they still contain 1-2% nitrogen as well as other nutrients.
In addition to nutrition, coffee grounds benefit the soil in several ways:
- Add water-holding organic material
- Improve drainage in heavy soils
- Attract beneficial earthworms
- Slightly acidify soil (beneficial for some plants)
The Correct Way to Use Coffee Grounds
Composting coffee grounds:
The best way to grow all plants. Add used grounds to your compost pile at a ratio of around 20 percent coffee to 80 percent other ingredients. Add filters if you use paper ones — they’re compostable.
Coffee grounds are a “green” in the compost (nitrogen-rich), so counter-balance them with browns like dried leaves.
Direct application:
Side dress acid-loving plants with used grounds. Apply it VERY thin, 1/4 inch max. Overdo it, and you will have a water-repellent crust.
Always mix grounds into the top inch of soil rather than leaving them on top.
Coffee ground tea:
Let 2 cups of used grounds sit in 5 gallons of water overnight. Strain, and use the weak “coffee” to water plants. This is a gentle flush of nitrogen.
Important Coffee Ground Warnings
Don’t overdo it. Fresh (unbrewed) grounds are extremely acidic and can be toxic to your plants. Only use brewed grounds.
Avoid thick layers. Spent coffee grounds can become compacted and water-repellent. Keep applications thin.
Not for all plants. Some plants dislike acidity. Stick with acid-lovers such as azaleas, blueberries and rhododendrons.
Watch for mold. If mold sprouts up on grounds, mix them promptly into soil or add to compost.
Top Plants to Use Coffee Grounds as Fertilizer
Acid-loving plants thrive on coffee:
- Azaleas and rhododendrons
- Blueberries
- Cranberries
- Hydrangeas (for blue flowers)
- Camellias
- Gardenias
- Carrots and radishes
Fertilizer #5: Grass Clipping Tea – Rapid Release Nitrogen
Fresh cut grass clippings are nitrogen-rich fertilizer that works really fast.
The Power of Green Growth
Plants are able to grow so quickly because they are filled with nitrogen. And when you mow, you’re cutting down this nitrogen-rich material.
Fresh clippings are 3-4% nitrogen—greater than many commercial fertilizers. They are also a source of potassium and phosphorus in smaller amounts.
And grass clipping tea pulls these nutrients into a liquid that is easy to apply.
Making Grass Clipping Fertilizer Tea
What you need:
- 2-3 pounds fresh grass clippings
- 5 gallons of water
- Large bucket with lid
- Strainer or cloth
Important: Use only clippings from lawns that have been untreated by herbicides or other pesticides. These chemicals can damage your garden plants.
Brewing instructions:
Half fill your bucket with fresh grass clippings. Fill bucket nearly full with water to saturate clippings. Place the lid back on to reduce any odors. Allow to steep for 3-5 days, stirring daily. The mix will start to turn brown and smell earthy (occasionally unpleasant). Strain out grass clippings. Throw them in your compost pile.
How to use:
Dilute the concentrated tea with water 1:1. The liquid should resemble weak tea. Apply directly to soil around plants. Use about 1 quart per large plant, and 1-2 cups for smaller plants.
Apply every 2-3 weeks during active growing periods.
Grass Clipping Mulch Method
For an easier remedy, use clippings directly as mulch.
Mulch with fresh clippings (1-2 inches thick) around plants. Clippings should be separated from stems to avoid rot. As clippings decompose, they release nitrogen directly into the soil. Reapply a few weeks later once they’ve broken down.
Thick layers can mat and smell unpleasant. Keep it light.
What Grass Clipping Fertilizer Provides
- High nitrogen: Promotes lush, green growth
- Fast results: Plants green up within days
- Free and abundant: Available whenever you mow
- Soil improvement: Provides organic matter while it decomposes
Best Uses for Grass Fertilizer
- Heavy feeders, such as corn, squash and tomatoes
- Leafy greens (lettuce, spinach, kale)
- Lawns (yes, leave clippings on the lawn itself)
- New plantings needing fast establishment
- Spring growth boost for perennials
Combining Fertilizers for Complete Nutrition
Each fertilizer excels at providing certain nutrients. Combining them creates balanced nutrition.
Smart Fertilizer Combinations
For vegetables:
- Compost tea every 2 weeks (complete nutrition)
- Banana peel fertilizer at flowering (potassium boost)
- Eggshell powder at transplanting (calcium foundation)
For flowering plants:
- Grass clipping tea early season (nitrogen for growth)
- Banana peel water during budding (potassium for blooms)
- Compost tea throughout (overall health)
For acid-loving plants:
- Coffee grounds monthly (nitrogen plus acidity)
- Compost tea bi-weekly (balanced nutrition)
For tomatoes:
- Eggshell powder at planting (prevent blossom end rot)
- Compost tea every 2 weeks (complete nutrition)
- Banana peel fertilizer when flowering starts (fruit development)
Application Schedule Example
| Week | Fertilizer | Plants |
|---|---|---|
| 1 | Compost tea | All plants |
| 2 | Grass clipping tea | Heavy feeders |
| 3 | Compost tea | All plants |
| 4 | Banana peel water | Flowering/fruiting plants |
| 5 | Compost tea | All plants |
| 6 | Coffee grounds | Acid-lovers |
Rotate and adapt as your plants react.
Easy and Effective Application of Fertilizer
Best Practices for Liquid Fertilizers
Water first: Water the soil before using any liquid fertilizer. This will prevent root burn and ensure even distribution.
Morning application works best: Plants are best able to absorb nutrients from soil early in the day. Avoid hot afternoon sun.
Foliar feeding timing: Spray leaves in the early morning or late evening when pores are open. Never spray in direct sunlight.
Temperature matters: Fertilize when temperature is moderate (60-80°F). Extreme heat or cold slows nutrient uptake.
Storage and Shelf Life
Compost tea: Use immediately. After 12-24 hours the benefits decline rapidly.
Banana peel powder: Stores for months in an airtight container in a cool, dry place.
Eggshell powder: Stores indefinitely if completely dry and sealed.
Coffee grounds: Use within a week or they’ll mold. Store in paper bags, not plastic.
Grass clipping tea: Use within one week. Refrigerate if storing more than a day.
Signs You’re Over-Fertilizing
Even organic fertilizers can be too much of a good thing.
Warning signs:
- Leaf tips turning brown and crispy
- Excessive leafy growth but no flowers or fruits
- Salt crust on soil surface
- Wilting despite adequate water
- Stunted growth
If you notice these symptoms, flush the soil with plain water and reduce the frequency of fertilizer applications.
Troubleshooting Common Fertilizer Problems
Problem: My compost tea smells rotten.
Solution: That means it became anaerobic. Remember to always aerate the tea during brewing. Don’t use tea that smells rotten, as it can damage plants.
Problem: Eggshell powder is not decomposing.
Solution: Grind shells finer. Large chunks may require 6-12 months to decompose. Fine powder works within weeks.
Problem: Coffee grounds created a crusty layer.
Solution: Never apply thick layers. Mix grounds into soil immediately. Water thoroughly after application.
Problem: Banana peel water smells terrible.
Solution: Normal fermentation odor is fine, but if it smells truly rotten, it has gone bad. Start fresh and use soon after you make it.
Problem: My grass clipping tea is too strong.
Solution: Dilute it more. Begin with a 1:2 (tea:water) mix and monitor the reaction of the plant. You can always make it stronger next time.
Frequently Asked Questions
Can I use these fertilizers on all plants?
The majority of plants will thrive with these fertilizers, as long as you tailor them according to specific needs. Acid-lovers appreciate coffee grounds. Banana peel fertilizer is loved by flowering plants. Nitrogen-rich grass clipping tea helps leafy greens thrive!
How often should I fertilize with homemade fertilizers?
Liquid fertilizers can be applied every 1-2 weeks during active growth. Solid amendments such as eggshell powder work as monthly applications. During dormant periods, plants need less fertilizer.
Are these fertilizers safe for edible gardens?
Absolutely. All of these fertilizers are 100% organic and safe for vegetables, fruits, and herbs. They are actually healthier compared with chemical fertilizers as they promote soil biology.
Will these attract pests to my garden?
Well-made liquid fertilizers do not attract pests. To prevent fruit flies, bury solid materials (banana peels, coffee grounds). Compost tea should have an earthy smell, not a rotten one.
Can I combine different fertilizers together?
Yes, but it’s better to apply them separately on different schedules. This prevents nutrient overload and lets you target specific plant needs.
How long until I see results?
Liquid fertilizers show results quickly—usually within 3-7 days. You will see greener leaves and stronger growth. Solid amendments work slower, taking 2-4 weeks.
What if I don’t have compost for compost tea?
You can purchase bagged compost from garden centers. Worm castings also make excellent tea. Start your own compost pile to have a free supply.
Can these fertilizers burn my plants?
Organic fertilizers are milder than synthetic products. However, very concentrated applications can still cause problems. Always dilute liquid teas and avoid over-application.
Start Feeding Your Garden the Natural Way
You now have five powerful organic fertilizers at your fingertips. Each is almost free to produce and brings tremendous value to your garden.
Start with whichever fertilizer seems easiest based on materials you have available. Already drinking coffee every morning? Begin with coffee ground fertilizer. Eating lots of bananas? Try banana peel water.
Don’t feel pressured to make all five immediately. Master one or two first. Try them all as you become more confident.
Your plants will respond with healthier growth, better yields, and increased disease resistance. Your soil will continue to improve year after year as organic matter is built up.
The money you save on fertilizer can buy more seeds or plants. Or keep it in your pocket. Either way, you win.
Next time you’re about to throw away coffee grounds, eggshells or banana peels, remember: that’s not garbage. That’s garden gold waiting to happen. For more home gardening tips and sustainable practices, explore resources that can help you create a thriving organic garden.
Stop buying expensive fertilizers that harm soil and drain your wallet. Start making powerful organic fertilizers that build soil health while feeding plants exactly what they need. According to the USDA, organic gardening practices improve long-term soil fertility and reduce environmental impact.
Your garden is waiting. Those kitchen scraps are waiting. The transformation starts today.