
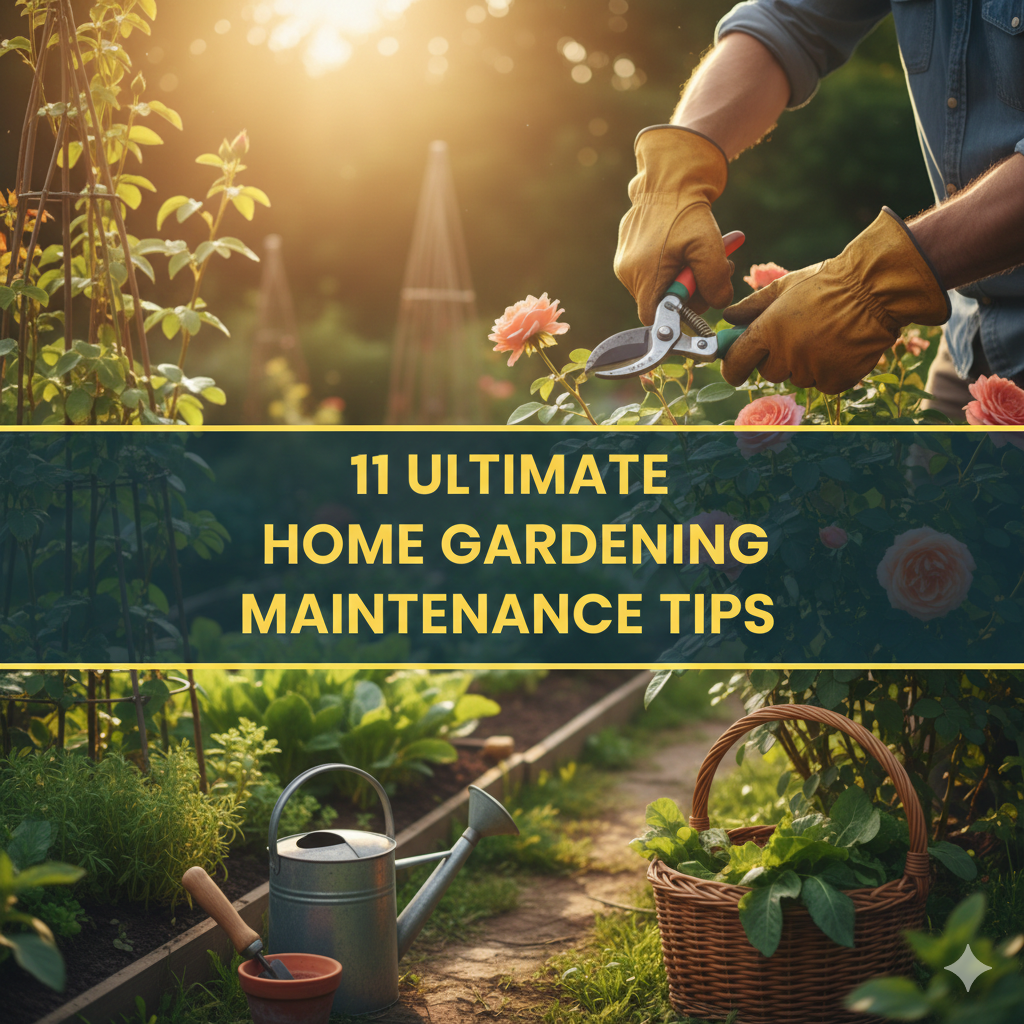
11 Ultimate Home Gardening Maintenance Tips
The Reason For Proper Maintenance
You planted your garden with eager anticipation. Seeds sprouted. Seedlings grew. Everything looked perfect.
Then reality hit. Weeds appeared overnight. Pests discovered your tomatoes. There were plants that just up and died, seemingly for no reason.
Here’s the thing: planting a garden is all the easy stuff. A healthy one that works properly must be maintained.
Most crashed and burned gardens don’t fail because of bad luck, but rather from lack of maintenance. Routine maintenance can head off most problems before they start.
The good news? Garden upkeep need not involve backbreaking labor to take hours. Successful gardeners work smarter, not harder.
This ultimate round-up of home gardening maintenance tips comes from experienced gardeners who’ve done it all and found out what works best. Each tip zeroes in on practical actions that really achieve results.
These maintenance tips, whether you are growing vegetables, flowers or herbs, can be applied to any garden. They’re there to help you grow more food, prevent pest problems and also enjoy your garden rather than wage war against it.
Now, let’s take a look into the maintenance practices that distinguish successful gardens from not-so-successful ones.
Tip #1: Deep and Infrequent Watering
The No. 1 Watering Mistake Most Gardeners Make
Lighter, more frequent watering leads to weaker plants. This light watering encourages the roots to remain at or near the surface. Surface roots desiccate rapidly and can’t reach deep soil nutrients.
Deep but infrequent watering results in strong plants. Roots develop seeking water in the ground. The roots of plants with deep taproots can reach more nutrients and handle drought better.
Most vegetables require 1-2 inches of water per week. That includes rainfall.
How to Water Correctly
Irrigate during the early hours of the day, from 6-10 AM. Plants absorb moisture efficiently. Leaves dry quickly, preventing disease.
Avoid evening watering. Leaves that remain wet overnight become a breeding ground for fungal diseases.
Use a rain gauge to measure how much water your garden receives. Place it among your plants. Check it weekly.
Water deeply every time you water. The water should seep about 6-8 inches deep. Put your finger in the dirt to gauge depth.
Signs Your Plants Need Water
If your tomatoes are wilting in the morning, they need water now. It is normal for the plants to wilt a bit in afternoon heat and they do not need emergency watering.
Water soil that is dry to a depth of 2 inches.
Water stress is indicated by leaves turning gray-green and not bright green.
Top Watering Techniques by Type of Garden
Soaker hoses direct water to roots. And they lose less water to evaporation. Perfect for vegetable rows.
Drip irrigation is the most efficient system. It targets individual plants. Great for permanent gardens.
Hand watering is just fine for small gardens. Use a watering wand for getting down into the soil without splashing against leaves.
Sprinklers are the least effective but can be used for larger spaces. Run them early morning only.
Tip #2: Mulch Everything Like Your Garden’s Life Depends On It
Why Mulch Is Your Garden’s Secret Weapon
Mulch forms a protective barrier over the soil. It solves multiple problems simultaneously.
A good mulch cuts water needs by 50%. It traps moisture in the soil between waterings.
Mulch suppresses 90% of weeds. They can’t get to soil to germinate.
It regulates soil temperature. Roots are thus cooler in summer and warmer in spring.
Organic mulch nourishes soil as it decays. You’re building soil and heading off problems.
Top Mulch for Vegetable Gardens
Straw is perfect for vegetable gardens. It’s clean, low-cost and easy to use. Use straw, not hay. Hay contains weed seeds.
Wood chips work just fine for perennial gardens and paths. They do not break down as fast as straw, but they take years to fully decompose.
Shredded leaves are free if you have trees. They add excellent organic matter. Run your mower over leaves to shred them.
Grass clippings make good mulch in thin layers. Just do 1-2 inches at a time. Thick layers become slimy.
Compost serves double duty as mulch and fertilizer. Apply 1-2 inches around plants.
Proper Mulching Technique
Apply mulch 2-4 inches deep. Thinner layers don’t really block weeds. Thicker layers can suffocate plants.
Allow 2-3 inches between plant stems and mulch. Mulch touching stems causes rot.
Replace mulch mid-season as it breaks down. Add another inch or two to ensure coverage.
Avoid putting down mulch that is stinky or has a sour odor. This is anaerobic decomposition which may cause damage to your plants.
Mulch Comparison Chart:
| Type of Mulch | Cost | Longevity | Best For | Weed Control |
|---|---|---|---|---|
| Straw | Low | 1 season | Vegetable beds | Excellent |
| Wood chips | Low-Medium | 2-3 years | Paths, perennials | Excellent |
| Shredded leaves | Free | 6-12 months | All gardens | Good |
| Grass clippings | Free | 2-4 weeks | Quick nitrogen boost | Fair |
| Compost | Medium | 1-2 months | Around plants | Fair |
Tip #3: Feed the Soil, Not Just the Plants
Healthy Soil Creates Healthy Plants
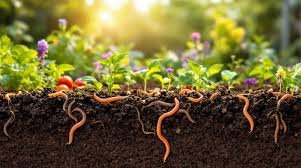
The majority of gardeners concentrate on feeding plants. The wise gardener feeds the soil instead.
Billions of beneficial organisms can be found in soil. These microorganisms turn organic matter into nutrients plants can use.
When you feed soil organisms, soil organisms feed your plants. It’s an organic system that works better compared to chemical fertilizers.
Chemical fertilizers offer instant nutrients, but they won’t do anything for the health of the soil. Natural amendments create soil fertility that can last for years.
Adding Organic Matter Regularly
Add compost to your garden beds twice a year. Add 1-2 inches both spring and fall.
Top-dress around existing plants each month during the growing season. Add a thin layer of compost around each plant.
Turn under cover crops in the fall. Nitrogen-fixing plants like clover and rye add nitrogen along with organic matter.
Never leave soil bare. Nutrients are lost from bare soil to rain and wind. Always cover with mulch or live plants.
Natural Fertilizers That Work
Compost is the gold standard. It’s full of nutrients in balance and feeds soil biology.
Worm castings are highly concentrated plant food. Use them for seedlings and transplants.
Fish emulsion provides quick nitrogen. Use it for greens and fast growers.
Bone meal provides phosphorus for strong roots and flowers. Incorporate into the soil at time of planting.
Kelp meal supplies trace minerals. It helps plants stand up to stress and disease.
Reading Your Soil’s Needs
Healthy soil is dark, crumbly and earthy-smelling. Healthy soil allows plants to grow with vigor.
Light-colored, hard-packed soil craves organic matter. It will not be able to retain water or nutrients effectively.
Test the soil every 2-3 years. Tests show the pH range and deficiencies of nutrients. You can get affordable testing at your local extension office.
For sustainable soil building tips and organic gardening advice, check out information on maintaining a healthy garden naturally.
Tip #4: Be Proactive Against Weeds with Smart Prevention
Why Weed Control Matters
Weeds will compete with your plants for water, nutrients and the sun. A weedy garden produces 30-50 percent less yield than a clean one.
Pests and diseases also reside in weeds. Most garden problems begin in weedy places.
The solution for weed control: The best way to fight weeds is not to let them get started in the first place. Prevent weeds while still seedlings, not after they’ve taken root.
The Best Times to Fight Weeds
Pull weeds when they’re tiny. Small weeds come out very easily, roots and all.
Never let weeds go to seed. A single weed yields thousands of seeds. “One year’s seeds make seven years’ weeds” is not just a proverb.
Weed after rain or watering. Moist soil releases roots completely. Dry soil shatters roots, and pieces regrow.
Devote 15 minutes a day to weeding instead of hours once a month. Frequent weeding deters large infestations from occurring.
Tools That Make Weeding Easy
Stirrup hoes cut weeds just under the soil. They’re quick and efficient for rows of vegetables.
Hand weeders with forked ends can remove one weed at a time without disturbing other plants.
Flame weeders scorch weeds to death with heat. They are effective on driveways and in paths, but they can’t be used near plants.
Landscape fabric under mulch can suppress weeds in permanent plantings. Use it with perennials and shrubs; don’t use it on annual vegetables.
Natural Weed Prevention Strategies
Thick mulch is your primary defense. Most weeds are smothered by 4 inches of organic mulch.
Plant densely. Plants that grow with touching leaves shade the soil and eliminate weed germination.
Use the “stale seedbed” technique. Two weeks before planting, water empty beds. Weeds grow, you kill them. Plant into clean soil.
Tip #5: Check for Pests Daily and Address Issues Early
Early Detection Saves Your Garden
Once you can see obvious damage from a pest, it’s often impossible to save the infected plants.
Daily garden walks last from 5 to 10 minutes. This basic practice catches issues when they are still addressable.
Look at both sides of leaves. Many pests hide on undersides.
Check where leaves meet stems. Insects will often cluster in these protected areas.
Examine new growth carefully. The most vulnerable tender young leaves are what pests are drawn to.
Common Garden Pests and Their Signs
Aphids congregate mainly on new growth, as well as flower buds. They deposit sticky honeydew on leaves. Knock them off with water or release ladybugs.
Tomato hornworms are large green caterpillars. They strip tomato plants overnight. Hand-pick them daily.
Cabbage worms are tiny green caterpillars that munch on brassicas. Inspect underneath leaves and remove them.
Squash bugs target cucumbers, squash and melons. Look under the leaves for clusters of bronze eggs. Crush eggs immediately.
Spider mites produce delicate webs on foliage. Plants look dusty and stippled. Spray with water often to avoid them.
Natural Pest Control Methods
Hand-picking is best for large insects. Drop them in soapy water.
Beneficial insects eat garden pests. Ladybugs eat aphids. Lacewings consume many soft-bodied insects. Attract them by planting flowers.
Row covers physically block pests. Cover tender plants with lightweight fabric.
Companion planting confuses pests. Marigolds repel many insects. Basil protects tomatoes.
Organic sprays like neem oil are effective for major infestations. Use them only as a last resort, not as the first response.
Tip #6: Prune and Pinch for Fuller, More Productive Plants
Why You Should Care About Pruning
Most gardeners wouldn’t even consider pruning their vegetables. They’re missing huge production increases.
Pruning removes unproductive growth. That funnels the energy of plants into producing food instead of too many extra leaves.
Pinching creates bushier plants. More branches equal more flowers and hence, more fruit.
Proper pruning improves air circulation. Better airflow prevents fungal diseases.
Basic Pruning Techniques
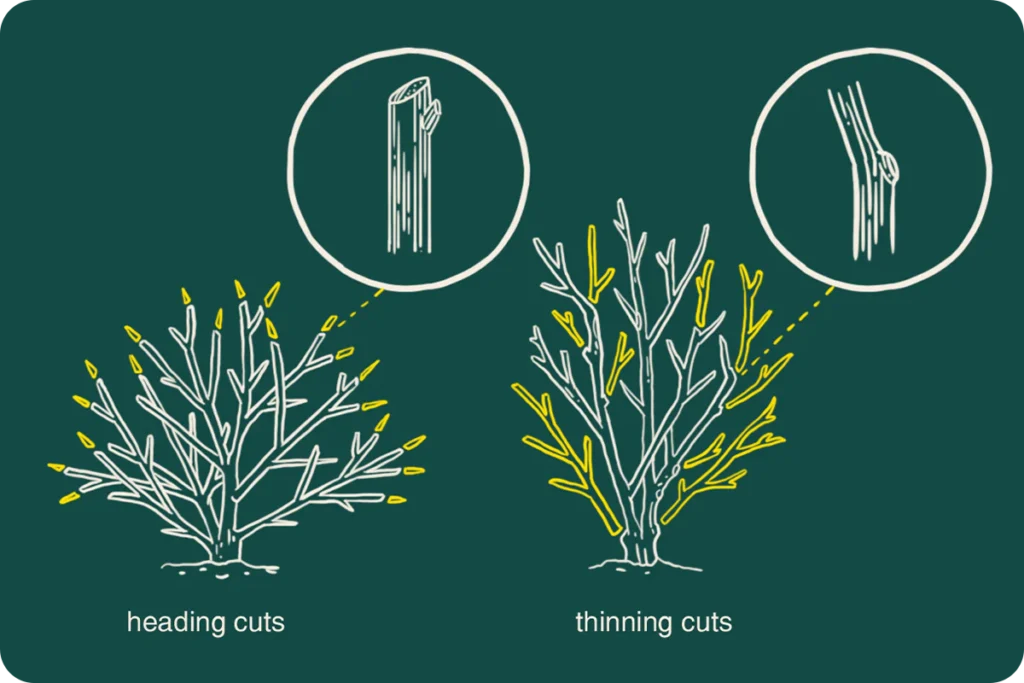
Pinching is nothing more than removing the growing tip with your fingers. This causes side branches to grow.
Pinch herbs when they reach 6 inches tall. They will bush out and double the crop.
Pinch tomato suckers (the shoots that grow between the main stem and branches). This diverts energy into fruiting.
Thinning involves removing an entire branch or stem. Thin densely growing shoots to increase air movement.
Deadheading is the process of cutting off wilted blooms before seeds are created. This encourages more blooms.
Deadhead when blooms fade on flowering plants. Many flower a second time.
Plants That Benefit Most from Pruning
Tomatoes yield larger fruit when pruned. Remove suckers on indeterminate types, once per week.
Basil becomes incredibly productive if pinched out regularly. Never let it flower.
Peppers benefit when the first flowers are pinched off. This promotes vigorous root growth before fruiting.
Cucumbers bear more fruit when damaged or diseased leaves are pruned.
Squash and melons appreciate dead leaves being removed. This increases aeration and decreases disease.
Tools for Pruning Success
Clean, sharp pruners make clean cuts. Ragged cuts invite disease.
Sterilize pruners in rubbing alcohol between plants. This prevents spreading diseases.
Your fingers are perfectly serviceable for pinching off tender new growth. No tools needed.
Tip #7: Rotate Your Crops to Interrupt Disease and Pest Cycles
Why the Same Spot Becomes a Problem
When we keep growing the same plants in the same place every year, we’re asking for trouble.
Soil diseases build up. Fungi and bacteria that prey on particular plants collect where those plants have grown.
Pests develop permanent homes. Insects that are specific to certain plants establish colonies in specific areas.
Soil nutrients become unbalanced. Different plants use different nutrients. Repeated plantings deplete specific minerals.
Simple Crop Rotation Rules
Do not grow the same plant family in the same spot for at least 3 years.
Nightshades (tomatoes, peppers, eggplant, potatoes) should rotate as a group.
Brassicas (cabbage, broccoli, kale, cauliflower) rotate together.
Legumes (beans, peas) add nitrogen. Follow them with heavier feeders, such as corn or tomatoes.
Root vegetables (carrots, beets, radishes) break up soil. Plant them after heavy-rooted crops.
Creating a Rotation Plan
Split your garden into 3-4 areas.
Allocate each plant family to one section.
The following year, move each family to the next section clockwise.
Keep records of what grew where. Photos work better than written notes for most people.
Simple 3-Year Rotation Example:
| Year | Section 1 | Section 2 | Section 3 |
|---|---|---|---|
| 1 | Tomatoes/Peppers | Beans/Peas | Cabbage/Broccoli |
| 2 | Beans/Peas | Cabbage/Broccoli | Tomatoes/Peppers |
| 3 | Cabbage/Broccoli | Tomatoes/Peppers | Beans/Peas |
Research from Cornell University’s College of Agriculture shows proper crop rotation reduces disease pressure by up to 75% compared to continuous planting in the same site.
Tip #8: Harvest at Peak Ripeness for Best Flavor and Production
Timing Your Harvest Correctly
Most gardeners wait too long to harvest. Overripe vegetables are devoid of flavor and lack texture.
On the other hand, others harvest too early, before the plant develops full flavor and nutrition.
Knowing when to harvest will increase the garden’s flavor and production.
Signs of Perfect Ripeness
Tomatoes should be fully colored but still firm. Indoor ripening continues after harvest.
Zucchini and summer squash taste best when 6-8 inches long. Giant zucchinis become woody and bland.
Cucumbers should be bright green and firm. Yellow cucumbers are overripe and bitter.
Lettuce is ready when leaves are full-sized but before it sends up a flower stalk.
Beans should snap when bent. If they don’t break when bent, they are too mature.
Peppers can be picked at any size. They turn red, yellow, or orange when fully mature.
The “Harvest More, Get More” Principle
Most vegetables produce more when you harvest regularly. Picking signals the plant to make more fruit.
Check productive plants like zucchini, beans, and cucumbers every other day minimum.
Don’t let produce overripen on the plant. Overripe vegetables stop new production.
Morning harvests taste better. Plants are full of moisture. Vegetables are crisp and flavorful.
Proper Harvesting Techniques
Use scissors or pruners for clean cuts. Pulling can damage plants.
Support stems with one hand while cutting with the other. This prevents breaking branches.
Handle tomatoes gently. Bruised spots rot quickly.
Harvest root vegetables when soil is dry. They clean easier and store better.
Tip #9: Keep Tools Clean and Sharp for Efficient Work
Why Tool Maintenance Matters
Dull tools make gardening harder than necessary. Sharp tools cut easily through soil and plant material.
Dirty tools spread diseases between plants. Pathogens hitchhike on soil and plant debris.
Rusty tools are difficult to use and can contaminate soil.
Well-maintained tools last decades. Neglected tools need replacement every few years.
Essential Tool Maintenance Tasks
Clean tools after each use. Hose off dirt. Scrub stubborn soil with a wire brush.
Dry tools completely before storing. Water causes rust.
Oil metal parts monthly. Use light machine oil or vegetable oil. Wipe off excess.
Sharpen blades annually. Sharp pruners make clean cuts. Sharp hoes slice weeds easily. Use a file or take them to a professional.
Tighten loose handles before they break. Replace cracked handles immediately.
Disinfecting Tools to Prevent Disease
Sterilize tools between plants when disease is present.
Dip blades in rubbing alcohol or 10% bleach solution. Let them air dry.
This is especially important when pruning tomatoes, which spread diseases easily.
Storing Tools Properly
Hang tools on wall racks. This keeps them organized and prevents rust.
Store them in a dry location. Garages work better than garden sheds for metal tools.
Fill a bucket with sand mixed with motor oil. Plunge tools into the sand after cleaning. The oil prevents rust.
Keep a tool maintenance kit handy: oil, sharpening file, wire brush, and rags.
Tip #10: Plan for Succession Planting to Extend Harvests
What Succession Planting Means
Most gardeners plant everything at once in spring. They harvest everything at once in summer. Then their garden sits empty.
Succession planting means planting new crops every few weeks. This creates continuous harvests instead of feast or famine.
You’ll have fresh vegetables all season instead of being overwhelmed for a few weeks.
Fast Crops Perfect for Succession
Lettuce matures in 30-45 days. Plant new rows every 2 weeks from spring through fall.
Radishes are ready in 25 days. Plant small amounts weekly for continuous harvests.
Bush beans produce for 2-3 weeks. Plant new rows every 3 weeks through mid-summer.
Carrots can be succession planted every 3 weeks. They store in the ground until needed.
Cilantro bolts in heat. Plant it every 2 weeks in spring and fall.
Replanting After Early Crops
When spring crops finish, immediately replant those spaces.
After spring peas come out, plant summer squash or beans.
When lettuce bolts in heat, replace it with tomatoes or peppers.
After harvesting garlic in mid-summer, plant fall brassicas.
Seasonal Succession Planting Guide:
| Time Period | Remove | Plant |
|---|---|---|
| Late Spring | Cool-season crops (lettuce, peas) | Warm-season crops (tomatoes, peppers) |
| Mid-Summer | Early potatoes, garlic | Fall brassicas, carrots |
| Late Summer | Summer squash, beans | Fall lettuce, spinach |
| Fall | Tomatoes (after frost) | Garlic, cover crops |
Timing Succession Plantings
Count backward from your first expected frost date. Most seed packets list “days to maturity.”
Plant fall crops so they mature 2 weeks before frost. This gives you a harvest window.
In spring, plant cold-tolerant crops early. Wait for soil to warm before planting heat lovers.
Tip #11: Keep Garden Records for Continuous Improvement
Why Records Transform Your Gardening
Memory fails. You won’t remember what you planted where or when problems occurred.
Records reveal patterns. You’ll discover which varieties perform best and which aren’t worth growing.
Documentation prevents repeating mistakes. Last year’s lessons improve this year’s garden.
Good records make garden planning simple. You know exactly what worked and what didn’t.
What Information to Track
Planting dates show when to start each crop for optimal timing.
Harvest dates and amounts reveal your most productive varieties.
Weather events explain unexpected problems or successes.
Pest and disease issues help you prepare for recurring problems.
Variety names ensure you can buy the same seeds next year.
Layout diagrams make crop rotation planning easy.
Simple Record-Keeping Methods
Garden journal: Write weekly observations in a notebook. Date each entry.
Photo documentation: Take pictures throughout the season. Photos show more than words.
Planting tags: Keep seed packets and plant tags. Write planting and harvest dates on them.
Digital notes: Use your phone to record observations immediately.
Calendar marking: Note major events on a wall calendar. Transfer to next year’s planning calendar.
Analyzing Records for Better Results
Review last year’s records before planning this year’s garden.
Note which varieties produced well. Grow them again.
Identify problems that repeated. Plan prevention strategies.
Track success rates. Calculate the percentage of plants that produced well.
Compare different varieties. Grow the winners again.
Frequently Asked Questions
How much time does proper garden maintenance really require?
Plan on 30-45 minutes daily for a typical home vegetable garden (400-600 square feet). This includes watering, harvesting, quick weeding, and pest checks. Weekly tasks like deep weeding and fertilizing add another 1-2 hours. Using mulch and efficient techniques significantly reduces time requirements.
What’s the most important maintenance task I shouldn’t skip?
Daily monitoring is number one. Walking through your garden for 10 minutes catches problems early when they’re easy to fix. Watering correctly comes second—deep, infrequent watering creates strong plants that need less maintenance overall.
Can I maintain a garden if I travel frequently?
Yes, with planning. Install drip irrigation on timers for automatic watering. Mulch heavily to retain moisture. Choose drought-tolerant crops. Ask a neighbor to harvest ripe vegetables in exchange for sharing produce. Most established gardens handle a week without attention.
How do I know if I’m over-maintaining my garden?
Signs of over-maintenance include: disturbing soil too frequently, removing every single bug you see (most are beneficial), pruning excessively, or fertilizing on a rigid schedule regardless of plant needs. Gardens thrive on consistent basic care, not constant intervention.
What maintenance tasks are most important during extreme heat?
Water deeply in early morning. Add extra mulch to insulate roots. Provide shade cloth for sensitive plants. Avoid fertilizing—it stresses plants in heat. Harvest ripe produce immediately. Don’t prune or transplant anything. Check soil moisture daily.
Should I maintain my garden differently in organic systems versus conventional?
Organic gardens require more attention to soil health and preventive pest control. You’ll spend more time on compost management and companion planting. But you’ll spend less time measuring and applying synthetic fertilizers and pesticides. Overall maintenance time is similar.
What’s the best way to maintain a garden when you’re a complete beginner?
Start small so maintenance doesn’t overwhelm you. Focus on watering correctly and mulching well—these prevent most problems. Check your garden daily but don’t panic over every imperfection. Join local gardening groups for advice. Keep simple records to track what works.
Creating Your Maintenance Routine
These 11 ultimate home gardening maintenance tips work together as a complete system. Each one supports the others.
Good watering reduces pest problems. Proper mulching minimizes weeding. Healthy soil grows stronger plants that resist diseases naturally.
Start by implementing 2-3 tips that address your biggest challenges. Master those before adding more techniques.
Create a simple maintenance schedule. Monday: water check. Tuesday: pest monitoring. Wednesday: quick weeding. This routine prevents overwhelming yourself.
Remember that maintenance gets easier with experience. You’ll learn to spot problems faster. Your garden becomes more self-sufficient as soil health improves.
The goal isn’t a perfect garden. Perfect gardens exist only in magazines. Real gardens have some weeds, occasional pest damage, and plants that don’t perform.
The goal is a productive, healthy garden that provides food and beauty without constant crisis management.
These maintenance tips transform reactive gardening into proactive care. Instead of fighting problems, you prevent them. Instead of rescuing struggling plants, you support thriving ones.
Your garden maintenance routine becomes a peaceful daily ritual instead of a stressful chore. You’ll notice small changes: a new flower, ripening fruit, or a beneficial ladybug arrival.
Start implementing these 11 ultimate home gardening maintenance tips today. Your future self will thank you when you’re harvesting abundant produce from a healthy, thriving garden.
The difference between a struggling garden and a flourishing one isn’t luck. It’s consistent, smart maintenance. Now you have the knowledge to make it happen.