5 Smart Ideas for Indoor Home Gardening in an Apartment
Your Apartment Wants a Garden, Too
Just because you live in an apartment doesn’t mean you have to give up on fresh herbs and homegrown vegetables. You don’t even need to have a backyard or balcony to grow some of your own food.
Indoor gardening is a joy, and thousands of apartment dwellers have been discovering that over the past year. Now they’re growing everything from cherry tomatoes to fresh basil in the middle of their living rooms and kitchens.
The secret? Smart planning, cool use of space.
Gardening indoors solves the most pressing problem of urban apartment life: there’s no outdoor space. But it has a lot more to recommend in this day and age. You control the environment completely. No weather surprises. No outdoor pests. Alone with your plants, in a controlled environment.
This post reveals the top 5 verified indoor gardening tips made for the apartment dweller. Both solutions maximize your small space and actually work.
Whether studio or two-bedroom rental apartment, that idea works. It’s time to turn your indoor space into a productive garden.
Idea #1: Windowsill Herb Gardens That Don’t Die of Neglect
Why Windowsills Are the Perfect Spot for Herbs
Your kitchen windowsill is best used for growing food. 4-6 hours of sunlight is needed by the majority of herbs each day. South-facing windows provide exactly that.
Herbs are the drug of choice for indoor gardening. They are forgiving, fast-growing and useful. You can buy tiny packages of basil, cilantro and parsley at the stores cut this time of year for $3–4. One plant makes the same amount each week for months.
The best part? Herbs take up minimal space. A 6-inch pot sits just right on most windowsills.
Top Herbs for Indoor Growing
Not all herbs thrive indoors. Stick with these proven winners:
Sweet basil grows quickly and loves heat. Keep it near your kitchen for easy access to fresh leaves. Pinch off the top every so often to promote bushy growth.
Mint practically grows itself. It spreads quickly, so be sure to keep it in its own pot. Great for tea, mojitos, summer beverages.
Cilantro prefers cooler temperatures than other herbs. It’s ideal for north-facing windows or areas without heating vents.
Parsley is a slow starter, but it makes an unreasonably late break and becomes extremely productive. Both flat-leaf and curly work well indoors.
Chives are almost impossible to kill. They tolerate low light better than most herbs and regrow after being cut.
Setting Up Your Windowsill Garden
Start with proper containers. Opt for pots that have drainage holes at the bottom. Water standing in pots will cause root rot.
Use real potting soil, not garden dirt. Potting soil drains more easily and is less likely to harbor pests.
Water when the top inch of soil is dry to the touch. More herbs are killed by watering them too much than not enough.
Turn your pots every day or two. You want all sides to receive equal light and not have lopsided growth.
Windowsill Herb Garden Setup:
| Item | Estimated Cost | Use |
|---|---|---|
| 5 small pots (6 inch) | $15 | For individual herb pots |
| Potting soil (1 bag) | $8 | Growing medium |
| Herb seeds or baby plants | $12 | Plant starts |
| Drainage tray(s) | $10 | To safeguard windowsill |
| Total startup cost | $45 | One-time cost |
Harvest Properly to Maintain Production of Plants
Never cut more than a third of the plant in one go. This rule will keep your plants full and productive.
Always cut from the top, never the bottom. This will stimulate branching and results in bushier plants with extra leaves.
Cut with scissors instead of ripping by hand. Clean cuts also heal faster and reduce the amount of stress a plant has.
For further direction on getting started with your indoor garden, look to resources for sustainable gardening practices that may also maximize your success.
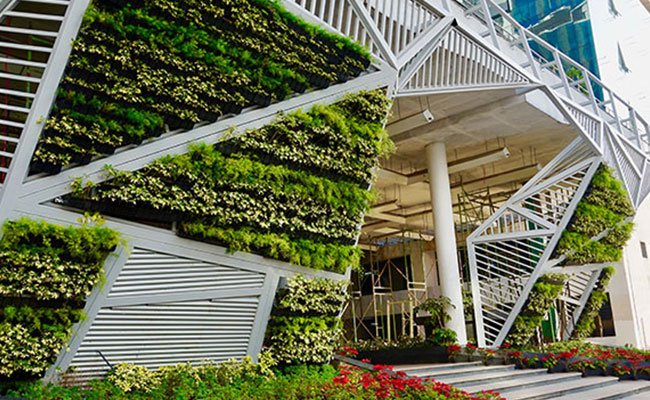
Idea #2: Utilize Vertical Growing Systems to Get More Space for Your Plants
Think Up, Not Out
In apartments, floor space is often at a premium. You can take a wall-crawling approach through vertical gardening. You can also grow 20 plants in the space it takes for two regular pots.
There are many styles of vertical systems. Wall-mounted planters, hanging pockets and tower gardens all perform well indoors.
The key advantage? You use space that nobody else does. That blank wall in your living room, or hallway, becomes a garden full of usable plants.
Types of Vertical Indoor Gardens
Wall-mounted planters: If you know that plant stands will be out of the way path then go for planters. They produce living wall art that also grows food. Opt for lightweight plastic or felt pocket systems meant for indoor use.
Stackable tower gardens are down on the floor, but they’re reaching up. Each level holds multiple plants. Some systems have watering built in, top to bottom.
Hanging rail systems are the curtain rods of gardening. Several pots hang from flexible hooks. Ideal for windows or walls in light.
Trellis and climbing systems support vining plants. Beans, peas and even little cucumbers all shoot up instead of out.
Best Plants for a Vertical Indoor Garden
Select according to your available light and type of vertical system.
Lettuce and salad greens are ideal for pocket systems. Their roots are shallow, so they don’t need deep soil to grow in. Harvest outside leaves and allow the center to continue growing.
Strawberry plants fruit in hanging units. Select ever-bearing varieties for a constant yield.
Cherry tomatoes require robust support, but they yield heavily in tower systems. Dwarf varieties stay compact.
Trailing herbs like oregano and thyme are lovely hanging from vertical walls.
Installation Tips for Renters
There are a lot of renters concerned about ruining walls. There are a few that will remove without leaving any permanent marks.
Try removable adhesive hooks rated for the weight of your system. Each hook holds up to 5 pounds.
Tension rod systems fit between floor and ceiling. No wall attachment needed.
Free-standing vertical gardens rest against walls. They can be moved and they make no marks.
Always confirm with your lease agreement prior to installation of any system. Photograph walls prior to setup to document what the walls looked like originally.
Idea #3: Indoor Hydroponic Countertop Gardens for Year-Round Supply
Why Hydroponics Is Ideal For Apartments
Hydroponic systems grow plants in water rather than soil. This may sound like a complex process, but it’s extremely easy with modern systems.
No dirt means no mess. Your countertop stays clean. No soil also means no soil pests such as fungus gnats.
Hydroponically grown plants grow 30-50% faster than soil plants. They yield more in less space.
Hydroponic systems consume 90% less water compared to traditional gardening as water is recirculated and doesn’t drain away.
Types of Countertop Hydroponic Systems
All-in-one smart gardens are the simplest choice. Brands like AeroGarden and Click & Grow have their year-round gardens. Just add water and pods.
Kratky method setups are the DIY rock-bottom end. The plants sit in containers of nutrient solution. No pumps or electricity needed. Perfect for lettuce and herbs.
Deep water culture systems oxygenate water using an air pump. The growth is absolutely fast in these. A little more complicated but highly effective.
What You Can Grow Hydroponically
Any vegetable will do, but there are some standouts:
Lettuce varieties are hydroponic superstars. They grow from seed to salad in as little as 30 days. One unit can generate enough for salads on a daily basis.
Basil is faster-growing and bushier than in soil. You’ll have basil to spare, that’s for sure.
Peppers love hydroponic systems. Indoors, both sweet and hot types fruit heavily.
Tomatoes need more extensive systems but give high yields. Cherry and grape tomatoes are the best.
Spinach and kale do well growing with no soil. For months of greens, keep harvesting the outer leaves.
How it Compares Cost-Wise: DIY vs. Pre-Made Systems
Ready-Made Smart Gardens:
| System | Size | Price Range | Plant Capacity | Ideal for |
|---|---|---|---|---|
| Small countertop unit | $80-$150 | 3-6 plants | Herbs, lettuce | |
| Medium garden | $200-$300 | 9-12 plants | Mixed vegetables | |
| Large system | $400-$600 | 24+ plants | Serious production |
DIY Hydroponic Setup:
| Item | Cost | Use |
|---|---|---|
| Storage containers | $15 | Hold plants |
| Net pots | $10 | Support plants |
| Hydroponic nutrients | $20 | Feed plants |
| LED grow light | $40 | Provide light |
| Air pump (optional) | $15 | Oxygenate water |
| Total | $100 | Basic system complete |
It’s Easier to Care for Than You Think
Change water every two weeks. If you are using a dry fertilizer, add it as directed on the package.
Monitor pH weekly using test strips. The majority of plants like pH between 5.5-6.5.
Keep it clean to avoid algae. Clean at least once every month. Sterilize with diluted hydrogen peroxide.
That’s it. The daily care of hydroponics tends to be less than it is for soil.
Idea #4: Grow Lights — Turn Any Space into a Garden
Why Grow Lights Change Everything
Some apartments don’t have sunny windows. It seems a no-win situation for gardening in a north-facing apartment or for that matter, in any room without windows.
Enter the era of grow lights, which solves this dilemma from top to bottom. They give off the very spectrum of light plants require to conduct photosynthesis.
Today’s LED grow lights are inexpensive, low-energy systems that generate little heat. You’ve got limited space, but you can create a productive garden in your apartment.
Understanding Light Requirements
Various plants require different levels of light:
Low-light plants (4-6 hours/day): Lettuce, spinach, herbs, and microgreens.
Medium light plants (6-8 hours a day): Peppers, beans, peas
High-light plants (10–12 hours/day): Tomatoes, cucumbers, fruiting plants
LED grow lamps allow for precise lighting at every stage of growth, something you can’t get from natural sunlight alone.
Types of Grow Lights for Apartments
LED panel lights are suspended from the ceiling. They’re the most efficient option. More than one plant can grow under a single panel.
Bulb-style grow lights can be screwed into regular lamps. Great for windowsill gardens, especially herbs that need as much light as possible.
Strip lights attach underneath shelves or cabinets. Perfect for growing microgreens and lettuce in small spaces.
Clip-on spotlights target individual plants. Necks are adjustable to position light right where you want it.
Building a Grow Light Garden Setup
Turn a shelving unit into your very own growing station. Every shelf is a growing level with a light of its own.
Metal wire shelving works best. It provides ventilation while being sturdy enough to support lights and plants.
Position the lights 6-12 inches above your plants. Raise the height as your plants grow to maintain distance from light source.
Use a timer for the light cycles. Plants need darkness too. The majority of vegetables thrive on 14-16 hours light and 8-10 hours darkness.
Indoor Grow Light Setup Costs:
| Part | Budget Option | Mid-Range | High-End |
|---|---|---|---|
| LED grow light | $25-$40 | $60-$100 | $150-$250 |
| Shelving unit | $30-$50 | $80-$120 | $200+ |
| Timer | $10 | $15-$20 | $30-$40 |
| Pots and supplies | $30 | $50 | $100 |
| Total | $95-$130 | $205-$290 | $480-$640 |
Energy Is Much Cheaper Than You Realize
LED grow lights are very energy-efficient. A standard 45-watt LED panel lit for 14 hours a day uses about $3 to $4 worth of electricity per month.
That’s less than a store-bought bunch of herbs. Your own garden can return the cost of its power in weeks.
Idea #5: Microgreens for Instant Gratification and Maximum Nutrition
Why Microgreens Are Great for Beginners
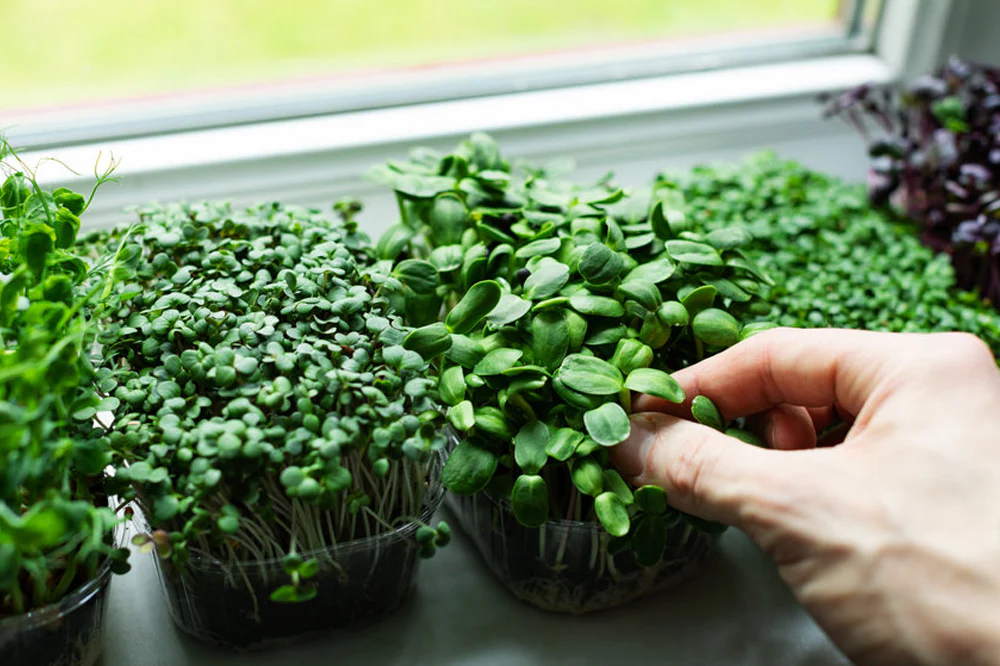
Microgreens go from seed to harvest in a week or two. No other crop provides this fast a payoff.
They’re nutritious powerhouses. Research has shown that microgreens are significantly more nutritious than their mature counterparts, by 4-40 times.
They require minimal space. A 10×20 inch tray makes enough microgreens to last a week of salad eating.
Best of all, there’s no special equipment needed to grow microgreens. You can grow them in shallow trays on the countertop or a table.
Most Popular Microgreens to Grow
Radish microgreens are spicy! They’re ready in just 7 days. Perfect for sandwiches and salads.
Sunflower shoots have a nutty flavor and crunchy texture. Kids love them. They are high in protein and vitamins.
Pea shoots are sweet and tender. They’re a luxury item at the stores, but they’re incredibly cheap to grow.
Broccoli microgreens have lots of sulforaphane, a potent anti-cancer compound. Ten times what’s in mature broccoli.
Mixed salad greens are a mix of lettuce, mustard and arugula. One tray brings you restaurant quality mixed greens.
The Simple Microgreens Growing Process
You need very little to begin:
Shallow trays without drain holes are fine to use. Takeout containers, bakery trays or specialized microgreen trays are all acceptable.
Seed starting mix or coconut coir is the growing medium. About an inch deep is enough.
Seeds specifically sold for microgreens. Regular seeds may have chemical treatments.
A gentle watering spray bottle. Microgreens have fragile roots that dislike being overwatered.
Step-by-Step Growing Instructions
Spread a nice even layer of seed starting mix in your tray. Moisten entirely, but do not make it soggy.
Sow seeds thickly over the surface. They should be touching but not stacked on top of one another.
Mist seeds lightly with water. Put another tray on top to block the light.
Place in a warm spot. Check daily and water if surface appears dry. Uncover once seeds sprout.
Seeds will sprout in 2-3 days. Remove the cover.
Move to bright light. You can use a sunny window or grow light.
Mist once or twice daily. Microgreens are fast growers and require steady moisture.
Harvest once the first true leaves appear. With scissors, snip just above the soil line.
Rinse your microgreens and then pat them dry. Eat quickly for the best level of freshness.
Production Schedule for Continuous Harvests
Start a new tray every 3-4 days. This results in an alternating harvest rotation.
You will have fresh microgreens to cut every few days. No gaps in production.
Weekly Microgreens Rotation:
| Day | Action | Result |
|---|---|---|
| Monday | Plant Tray 1 | Seeds begin to grow |
| Thursday | Plant Tray 2 | Tray 1 is sprouting |
| Sunday | Plant Tray 3 | Tray 1 can be moved towards the light |
| Next Monday | Harvest Tray 1 and plant a new tray | A continuous cycle has been established |
Combining Ideas for Maximum Production
You have more than one way in which you can make a difference. The wisest apartment gardeners combine multiple tactics.
Use your windowsills for herbs. Put a vertical system along one wall for lettuce and strawberries. Set up a little hydroponic system on your counter. Grow microgreens on a shelf under grow lights.
Each system occupies different space. Together, they make tremendous amounts of food.
Choose one idea that you’re most excited about. Master it completely. Then add another system.
With a little practice, you should be able to have a flourishing indoor garden in your apartment.
Common Challenges and Simple Solutions
Limited Natural Light
Problem: Your apartment receives hardly any sun.
Solution: Buy some LED grow lights. They work anywhere and allow for full control over the lighting.
Small Living Space
Problem: You don’t have any floor space to dedicate to a garden.
Solution: Go vertical. Use walls and hang plants from ceilings, or install shelving systems.
Overwatering Problems
Problem: You keep killing your plants by overwatering.
Solution: Always use pots that have drainage holes. Water when the top inch of soil feels dry. Check out self-watering pots that will put an end to overwatering.
Pest Issues
Problem: You have fungus gnats or something else pesky.
Solution: Plant in sterile potting soil, not dirt from outside. Allow soil to dry out a bit between waterings. Yellow sticky traps catch fungus gnats.
Temperature Fluctuations
Problem: Your apartment dramatically heats up or cools down.
Solution: Most plants grow well at 65-75°F. Place plants away from heating vents and air conditioning. Use fans for air circulation.
Frequently Asked Questions
Does indoor gardening in my apartment require expensive equipment?
No. Pots, potting soil, and seeds are really all you need to get started. A windowsill herb garden costs less than $30. Only add equipment such as grow lights if you’d like to expand or do not have natural light.
How much can I grow in a tiny apartment, really?
You can grow surprising amounts. A regular one-bedroom apartment can happily host 20-30 plants with windowsills, vertical systems and maybe a little grow light setup. This yields enough herbs, lettuce and small greens for daily use and a few peppers and tomatoes every once in a while.
Is my apartment going to become filled with bugs if I start indoor gardening?
Not unless you’re using dirty soil and watering without care. Sterile potting mix means no pests. The most common pest problem (fungus gnats) is a direct result of overwatering. Prevention is very simple.
What if I travel a lot for work?
Self-watering pots or hydroponic systems are good for frequent travelers. Since microgreens grow so quickly, you should not start them before you go on a trip. Herbs and mature plants can survive a week with no care if you thoroughly water them before you go.
Is it possible for me to grow enough food to actually save money on my grocery bills?
Yes, especially with herbs and greens. At the store, fresh organic herbs sell for around $3-4 per package. One basil plant produces that every week for months. Microgreens and lettuce are also major money savers. Tomatoes and peppers take longer, but once they get going they crop heavily.
Is indoor gardening more difficult than outdoor?
Actually, it’s often easier. You have all the control over temperature, pests and weather. No unexpected frost. No heavy rain. No outdoor pests including slugs and rabbits. The hardest part is getting enough light, which is eliminated altogether with grow lights.
What is the time frame to start getting results from indoor gardening?
It depends on what you grow. Microgreens harvest in 7-14 days. Lettuce and herbs in 4-6 weeks. From seed, peppers and tomatoes take 2-3 months to first fruits. Begin with fast-growing crops for success right away.
Your Indoor Garden Starts Today
You need not give up your gardening dreams just because you live in an apartment. These five smart ideas show you really can grow food indoors.
Begin with one option that suits your space and budget. Master it. Then expand to other techniques.
Your windowsill herb garden could evolve into an entire wall of vertical planters. Your countertop mini hydroponics could grow into multiple systems. Your first microgreens tray can turn into a production line.
Every plant you grow saves money and offers tastier, more nutritious food than the store can provide.
The best part? You’re creating something beautiful and functional in your living space! Instead of just a place to sleep, your apartment becomes a living garden.
These five smart ideas for indoor home gardening in apartments can turn any space into a green and productive oasis. No yard required. No balcony necessary. Just your imagination and the ability to think smart.
Pick one idea. Get the supplies. Plant your first seeds this weekend.
Your apartment garden is waiting.
For more comprehensive guides and tips on starting your gardening journey, visit the Gardening Know How apartment gardening section.