
6 Proven Organic Home Gardening Compost Ideas
Why Your Backyard Needs Its Own Compost Pile
All gardeners dream of growing lush, healthy plants that yield the maximum amount of fruit and vegetables. The miracle ingredient isn’t some fancy fertilizer or expensive chemical. It’s something much simpler: compost.
It’s the superfood of your garden. Home made with organic materials, you initiate black gold—composted garden waste that nourishes your plants, adds proper structure to your soil and saves money. You’re keeping food waste from landfill, too.
The vast majority of kitchen scraps and yard waste can actually be transformed into rich, nutritious compost in a matter of weeks to months. You don’t even need a large backyard or fancy equipment. Here’s how to start composting using six tried-and-true methods.
This guide will show you the way how to make compost naturally with the material on your hand. They each function in different ways, so you can select what works for your space, time and gardening goals.
Getting Organic Composting to Work For You
Before we get into the methods, though, let’s understand what makes compost happen.
Composting is controlled decomposition. Small organisms like bacteria and fungi digest organic material to form nutrient-rich soil amendment. These microorganisms need four things:
Carbon-rich materials (browns): Dry leaves, cardboard, newspaper, straw
Nitrogen-rich materials (greens): Fresh grass clippings, fruit scraps, vegetable peels, coffee grounds
Water: Ensures the pile remains moist and activates microorganisms
Air: Good bacteria need oxygen to thrive
Here’s the magic ratio: about 3 parts brown to every 1 part green. Too much green results in a stinky, slimy mess. Too much brown hampers decomposition to a grinding halt.
Remember those principles as we detail six composting methods.
Method 1: Traditional Compost Heap System
The traditional compost bin remains the most widely used method for home gardeners. It’s easy, it works in most climates, and it gets the job done.
Setting Up Your Bin
You can purchase a bin or build your own using wood pallets, wire mesh or cinder blocks. It should be at least 3 feet wide, 3 feet deep and 3 feet tall. This is sufficient heat to thermally decompose the polymer effectively.
It’s best to set your bin directly on exposed soil. This will let earthworms and other beneficial organisms in from beneath.
What Goes In
Yes to these items:
- Fruit and vegetable scraps
- Eggshells (crushed)
- Coffee grounds and tea bags
- Shredded newspaper
- Dry leaves and grass clippings
- Small twigs and branches
Keep these out:
- Meat and fish
- Dairy products
- Oils and grease
- Pet waste
- Diseased plants
Maintaining Your Pile
Add materials in layers. Put down browns, followed by greens, followed by still more browns. This layering provides rapid breakdown to help control odors.
Move your pile with a pitchfork or shovel every two weeks. This helps to oxygenate, as well as, spread the moisture. With a well-maintained bin you’ll have usable compost in 2-4 months.
The pile should feel similar to a wrung-out sponge. If it’s too dry, add water. If your pile is wet, add more materials that are brown.
Method 2: Vermicomposting With Red Wiggler Worms
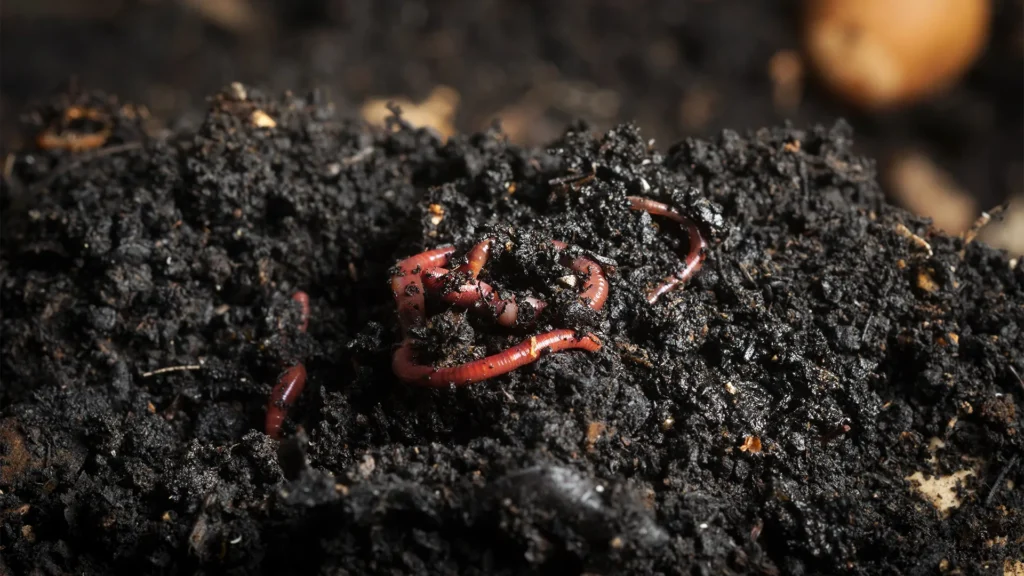
Vermicomposting involves special composting worms that eat away at kitchen waste. It’s great for apartments, small spaces or those who demand compost fast.
Why Worms Are Amazing
Feed red wiggler worms about half of their body weight per day in food. Their castings (worm poop) are 5 times higher in nitrogen, 7x the phosphorus and 11x the potassium of regular compost.
If you’re maintaining your worm bins correctly, they won’t stink. You can store these indoors under the kitchen sink or in a closet.
Creating Your Worm Bin
Take a plastic storage box with a lid. Pierce the sides and bottom of the container with small holes to let air circulate. The depth of the container should be between 8 to 12 inches deep.
If you are using a container, fill with shredded newspaper or cardboard. Wet it enough to make it damp but not sodden. Add a few handfuls of garden soil for beneficial microorganisms.
Buy red wigglers at the garden center, or order them online. Begin with one pound of worms for a standard bin.
Feeding Your Worm Army
Bury food scraps in other parts of the bedding each time you feed. This avoids fruit flies and also spreads the food out more.
Worms love:
- Coffee grounds
- Fruit peels
- Vegetable scraps
- Crushed eggshells
- Boiled pasta or rice (a little)
Avoid:
- Citrus peels (too acidic)
- Onions and garlic
- Spicy foods
- Meat and dairy
Harvest worm castings every 3 or 4 months by moving completed compost to one side and feeding worms on the other. Worms move through to the new bedding, allowing you to harvest the finished castings.
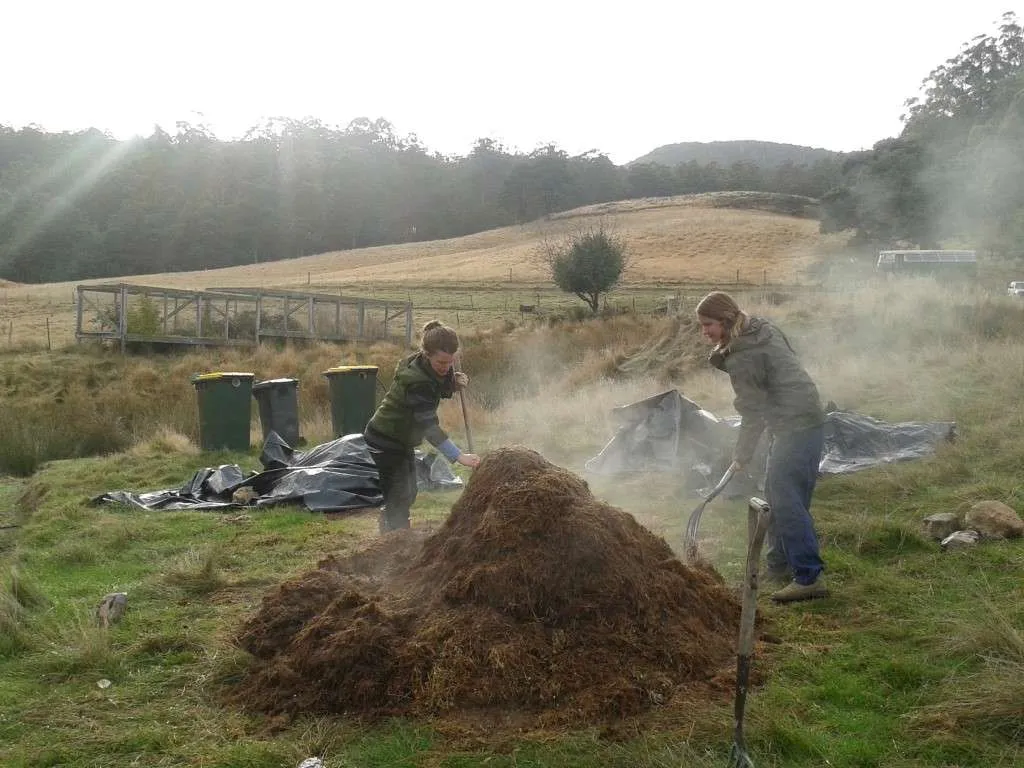
Method 3: Hot Composting for Quick Results
Hot composting yields finished compost in 4–6 weeks. It’s more work early on, but it yields the most immediate results.
How Hot Composting Works
You get heat when you stack up the correct combination of materials in the proper proportions and let them decompose. The temperature inside the pile can be 130 to 160 degrees Fahrenheit.
This heat also kills weed seeds and disease-causing organisms. And it completely accelerates decomposition.
Building Your Hot Pile
Gather enough material to form a pile at least 3 feet in each direction. Smaller piles won’t build enough heat.
Layer your materials:
- Base: Rough material (e.g. some sticks) for drainage
- 6-inch layer of brown materials
- 2-inch layer of green materials
- Sprinkle of garden soil
- Continue layering until stack is desired height
Give each layer of your pile a watering as you build. The pile should be uniformly damp all the way through.
Temperature Management
Monitor internal temperature with a compost thermometer. At 130 to 160 degrees, the pile is functioning ideally.
The temperature falls 3-4 days later. This tells us it’s time to turn the pile. Shift outer materials to the center, center materials to the outside.
Turn the pile every 3 to 4 days. Give your compost 4-6 turns and you’re good to go! The mixture will appear dark brown, smell earthy and have a crumbly texture.
Method 4: Trench Composting for Minimal Effort
Composting in trenches is very close to the laziest option. You dig, dump and done. No barrels, no turning, no tending.
The Simple Process
Find a spot in your garden you intend to plant in a few months. Dig a trench 12 inches deep and as long as you require.
Toss kitchen waste and other compostable items into the trench. Cut up large pieces to hasten the decomposition process.
Replace the soil you removed and cover up the scraps with your dirt. That helps keep animals from digging, and controls odors.
Strategic Placement
Rotate your trenches through the garden. It distributes nutrients evenly over your planting area.
Prepare trenches between established rows of plants. As materials break down, roots move toward the nutrients.
In autumn, dig trenches for next spring. By the time they are ready to plant, everything will have degraded into rich soil.
What Makes Trench Composting Special
This is perfect for those who have little time or cannot physically manage heavy lifting. There’s no heavy bin to turn or empty.
The decay takes place in the ground, where you can’t see it. This way your garden will always appear neat and clean whilst still actively composting.
Materials decompose in six to 12 months, depending on climate and what you bury. Sandy soil accelerates the process, while in clay soil it is slower.
Method 5: Bokashi Fermentation System
Bokashi is a Japanese fermentation process that can deal with things traditional composting cannot. This encompasses meat, dairy products and cooked food.
How Bokashi Differs
Instead of decay, bokashi relies on fermentation. A particular group of microorganisms pickle the scraps in an airtight container.
It’s an anaerobic process, which means it occurs without oxygen. This is not the case with conventional composting.
Setting Up Bokashi
You want two containers with tight-fitting lids and spigots at the bottom. Bokashi bucket kits are available in many garden centers.
You also need bokashi bran. That’s wheat bran that has been inoculated with beneficial microbes. It is available for purchase or can be made at home.
The Fermentation Process
Pile kitchen scraps into your bucket in layers. Sprinkle a handful of bokashi bran over the scraps after each addition.
Press down, pressing out air pockets. Seal the lid tightly after each addition.
Strain off the liquid (bokashi tea) from the spigot every few days. Dilute this liquid 1:100 with water and use as a potent plant feed for houseplants or outdoor beds.
In 2 weeks, the bucket will be full of the fermented material. It resembles pickled food and has a sweet-and-sour smell, not of rot.
Finishing the Process
Fermented bokashi material is not yet finished compost. It’s too acidic for direct plant contact.
Bury the fermented matter in garden soil or place them into a traditional compost bin. Decomposition is finished over 2 to 4 weeks by the soil microorganisms.
The fermented material degrades far more quickly than fresh scraps would.
Method 6: Leaf Mold as a Premium Soil Additive
For gardeners, leaf mold is pure magic. It is compost made entirely from fallen leaves, and it results in the fluffiest, most water-retentive soil amendment you can imagine.
Why Leaf Mold Deserves Attention
Where other compost methods may take months, leaf mold takes a while longer. But the wait is worth it.
Ready to use leaf mold retains up to 500 times its weight in water. It’s great for enhancing sandy soils that can drain too fast or clay soils that hold water.
The process is completely hands-off. No turning, no temperature monitoring and no special ratios to keep up.
Making Leaf Mold
Collect fallen leaves in autumn. You can use any kind you want, but oak and maple leaves are great.
Method one: Stuff big plastic bags with damp leaves. Punch a few holes in the bags for air circulation. Tie them closed and keep them out of the way.
Method two: Make a simple wire mesh cylinder. Fill it with moistened leaves and wait.
That’s it. Just wait.
The Timeline
Leaf mold will typically take 1-2 years to completely break down. Leaves decay due to fungal action, instead of bacterial breakdown.
You can quicken the process slightly by shredding leaves before you add them. Just run a lawn mower over the top and it works great.
Check moisture levels occasionally. The pile should be moist to the touch, but not sopping wet.
Using Leaf Mold
The finished product looks very dark brown and crumbly. Individual leaf pieces become unrecognizable.
Combine it into vegetable garden beds prior to planting. Use it on trees and shrubs as mulch. Mix it into potting soil for a little extra water retention.
Many gardeners consider leaf mold superior to regular compost for improving soil structure.
Troubleshooting Common Composting Problems
Even experienced composters face challenges. Here’s a guide for troubleshooting what ails you.
Smell Problems
Rotten egg/ammonia smell: Too much high-nitrogen green material. Incorporate brown material and mix the pile.
Rotten odor: Too much water or not enough air. Flip the pile and mix in dry brown material.
Pest Issues
Fruit flies: Bury new scraps under browns. Always maintain a cover of browns on top.
Rodents: Cease putting in meat, dairy and cooked foods. Use a bin with a secure lid.
Slow Decomposition
Pile is cold: Too small, too dry, or improper ratio. Expand pile, add water, or increase green-to-brown ratio.
Months later, no progress: Materials too large. Chop ingredients into smaller pieces.
Using Your Finished Compost
You’ll be able to tell that compost is ready when it appears dark brown or black, smells earthy like forest soil and feels crumbly. Original materials should be unrecognizable.
Application Methods
Garden beds: Apply 2 to 4 inches of compost over beds and work into the top six inches of soil prior to planting.
Around established plants: Use 1 to 2 inches as a mulch, pulling back from plant stems.
Lawn top dressing: Sift compost through hardware cloth and use as a top layer for grass.
Potting mix: Combine equal parts compost, peat moss or coconut coir and vermiculite or perlite.
Compost tea: Soak compost in water for 24 hours to make a liquid fertilizer.
For more tips on organic gardening and sustainable practices, visit our complete guide to home gardening.
Seasonal Composting Tips
Spring Strategies
Begin new piles as temperatures warm. Carefully follow the advice on adding grass clippings as lawns start growing. Too much at a time results in slime.
Turn winter piles that were sluggish in the cold. Supplement with materials to get decomposition going.
Summer Management
In summer it is quick to heat up, turning into compost. Monitor moisture levels closely. Hot weather can dry out piles fast.
Provide some shade for your bin if temperatures are consistently 90 degrees or hotter. Excessive heat can kill beneficial organisms.
Fall Opportunities
Fallen leaves are composting gold. Gather them up for use or bag them away until next year.
Build hot piles in fall. They’ll decompose over a mild winter in many zones.
Winter Considerations
In cold temperatures, piles freeze or move very slowly. Keep adding materials anyway. They will break down when spring comes.
Insulate the bins with straw bales or leaves to keep decomposition going through the chillier months.
Indoor methods like vermicomposting and bokashi function year-round, regardless of the weather.
Environmental Benefits of Home Composting
Composting at home also creates positive ripple effects that extend beyond your garden.
Landfill reduction: When food waste is sent to the landfill, it produces methane, a potent greenhouse gas. Composting prevents this.
Water conservation: Soil enriched with compost retains moisture better, significantly reducing irrigation needs (by up to 50 percent).
Chemical reduction: Rich compost lessens or eliminates the need for chemical fertilizers.
Carbon sequestration: Ready compost sequesters carbon in the soil rather than releases it as a gas.
Wildlife support: Compost-fed gardens support greater variety of beneficial insects and pollinators.
A single home composting kitchen scraps saves about 200 pounds of waste a year from landfills. Learn more about the environmental benefits of composting from the EPA.
Frequently Asked Questions
How long does it take to make compost?
It depends on your method. Hot composting yields results in 4 to 6 weeks. It takes 2 to 4 months in traditional bins. It’s 1 to 2 years for leaf mold. Vermicomposting produces finished castings in 3-4 months.
Can I compost in an apartment?
Absolutely. Composting with worms and bokashi both are great for small living spaces. When kept properly, they don’t smell and are easy to store.
How do compost and fertilizer differ?
Fertilizer contributes specific nutrients to the soil. Compost adds nutrients while improving soil structure, water-holding capacity and microbial life. Compost is an all-around soil amendment, not just a nutrient source.
Should I add special activators or accelerators?
No. The natural bacterial and fungal community will automatically populate your pile. Save your money. You just need the right ratios of brown and green, proper moisture, and regular turning.
Are citrus peels and onions okay to compost?
In traditional compost bins, yes. You should only use small amounts of them, since they slow down decomposition a bit. Avoid them in worm bins as they are too acidic for worms.
Why is my compost pile not heating up?
Common reasons include: pile is too small (it should be at least 3x3x3 feet), it’s too dry, the ratio of green to brown material is off, or it doesn’t have enough nitrogen-rich material. Correct these problems and the pile should heat up.
Is it safe to compost diseased plants?
Only in hot compost piles that exceed 140 degrees. High heat kills pathogens. For traditional or cold compost, dispose of diseased plants elsewhere so you don’t spread the problem.
When is compost ready to use?
Finished compost looks dark and crumbly, smells like a forest floor, and feels slightly moist. You shouldn’t recognize original ingredients. If you can still identify food scraps or leaves, it needs more time.
Start Composting Today
You don’t have to be an expert gardener to create great compost. These 6 reliable techniques work for beginners as well as experienced growers.
Select the option that best complements your life, environment and objectives. Live in an apartment? Try vermicomposting. Want fast results? Build a hot pile. Prefer low maintenance? Dig a trench or create leaf mold.
Composting is great because you get to see trash transform into garden gold. Those vegetable peels and coffee grounds are the fuel for beautiful flowers, crisp salads and juicy tomatoes.
Start small if you’re uncertain. Even one bokashi bucket or small worm bin makes a difference. Once you feel more confident, increase your composting efforts.
Your garden will thank you with healthier plants, larger harvests and more fertile soil. Your wallet will thank you for the money you save on fertilizers and soil amendments.
And most importantly, you’ll be part of the solution to problems involving food waste and the environment. Every discarded banana peel and autumn leaf you compost is one less item sitting in a landfill, producing harmful greenhouse gases.
The six methods described here have been used by millions of gardeners around the world. They’ll work for you too. Choose one, gather your supplies and start creating your own organic home gardening compost today.
Your journey toward healthier soil and more productive gardens starts with one single handful of kitchen scraps. Make it happen now.