When Your Garden Needs Emergency Care
That sinking feeling hits hard when you notice your favorite plant looking sick.
Yesterday it was thriving. Today the leaves are yellow, wilted, or dropping like autumn has arrived early. You wonder if you’ve killed it completely.
Here’s the truth: Most “dying” plants aren’t actually dead. They’re stressed, struggling, or crying out for help. And with the right intervention, you can bring them back from the brink.
This guide delivers five proven recovery methods that work fast. These aren’t slow, gradual improvements. These are emergency rescue techniques that show results within days, sometimes hours.
Whether you’re dealing with overwatered soil, sun-scorched leaves, or mysterious yellowing, these tips address the most common plant emergencies home gardeners face.
The best part? You don’t need expensive products or special training. Everything you need is probably already in your home.
Let’s save your plants before it’s too late.
Reading the Warning Signs Correctly
Before jumping into solutions, you need accurate diagnosis.
Plants communicate distress through visible symptoms. Learning to read these signals means faster, more effective treatment.
Critical vs. Cosmetic Damage
Not all plant problems are emergencies. Some issues look alarming but won’t kill your plant.
True emergencies requiring immediate action:
- Completely wilted stems that won’t recover overnight
- Root rot with black, mushy roots and foul smell
- Sudden leaf drop affecting 50% or more of the plant
- Severe pest infestation with visible colonies
Non-urgent issues that improve with time:
- A few yellow lower leaves (natural aging)
- Brown leaf tips from low humidity
- Slow growth during winter dormancy
- Minor cosmetic damage from past mistakes
Focus emergency efforts on life-threatening problems. Everything else can wait.
The Touch Test for Plant Health
Gently squeeze a stem between your fingers. Healthy plant tissue feels firm and slightly flexible.
Dying tissue feels mushy, hollow, or brittle. If stems snap easily or feel soft and wet, that section is beyond saving.
Check multiple spots on the plant. One dead branch doesn’t mean the whole plant is doomed.
Quick Visual Assessment Guide
| Symptom | Likely Cause | Urgency Level |
|---|---|---|
| Wilted leaves, dry soil | Underwatering | High – Act within 24 hours |
| Wilted leaves, wet soil | Overwatering/Root rot | Critical – Act immediately |
| Yellow leaves, bottom first | Natural aging | Low – Monitor only |
| Yellow leaves, random pattern | Nutrient deficiency | Medium – Address within week |
| Brown crispy edges | Low humidity/salt buildup | Medium – Improve conditions |
| Dropping green leaves | Shock/temperature stress | High – Stabilize environment |
Tip 1: Emergency Watering Rescue for Dehydrated Plants
Severely underwatered plants look dead but often aren’t.
Crispy leaves, shriveled stems, and bone-dry soil signal desperate thirst. The good news? Rehydration works remarkably fast when done correctly.
The Bottom-Soak Method
Never pour water directly on severely dehydrated soil. It runs straight through without absorbing, wasting water and not helping your plant.
Instead, use the bottom-soak technique:
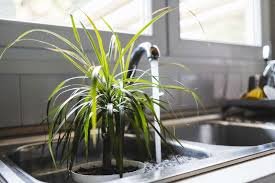
Step 1: Fill your sink, bathtub, or large basin with 3-4 inches of room-temperature water.
Step 2: Place the entire pot in the water. Let it sit for 30-60 minutes.
Step 3: Watch drainage holes. You’ll see bubbles as air escapes and water fills the root zone.
Step 4: Remove the pot when bubbles stop. Let excess water drain completely.
This method forces water to move upward through soil, ensuring complete saturation.
Adding Moisture Retention
After rehydration, prevent future dehydration with these strategies:
Top dress with mulch: Add a 1-inch layer of bark chips or moss on the soil surface. This dramatically reduces evaporation.
Switch to self-watering pots: These containers have built-in reservoirs that supply consistent moisture.
Move away from heat sources: Radiators, heating vents, and sunny windows accelerate water loss.
Recovery Timeline for Underwatered Plants
Hour 1-2: Wilted leaves begin perking up
Hour 4-6: Most foliage regains turgor (firmness)
Day 1-2: Leaves fully recovered, slight droop gone
Day 3-7: New growth appears if damage wasn't severe
Week 2+: Plant returns to normal growth pattern
Most underwatered plants show dramatic improvement within 6-12 hours of proper rehydration.
Tip 2: Root Rot Intervention That Actually Saves Plants
Root rot kills more houseplants than any other problem.
It happens when roots sit in waterlogged soil for too long. Oxygen-starved roots turn black and mushy. Beneficial bacteria die while harmful fungi thrive.
Caught early, root rot is completely reversible. Caught late, you might save part of the plant through propagation.
Identifying Root Rot Quickly
Remove the plant from its pot. Healthy roots are white, cream, or light tan. They feel firm like cooked spaghetti.
Rotted roots look black or dark brown. They feel slimy and fall apart when touched. You’ll smell a swampy, rotten odor.
If more than 70% of roots are rotted, the plant is likely beyond saving. Focus on taking healthy cuttings for propagation instead.
Emergency Root Surgery
For plants with 30-70% root damage, aggressive pruning saves them:
Step 1: Remove all soil by gently rinsing roots under lukewarm water.
Step 2: Use sterilized scissors or pruning shears (wipe with rubbing alcohol).
Step 3: Cut away all black, brown, or mushy roots. Be ruthless. Only healthy white roots should remain.
Step 4: Trim back top growth by 30-40%. Fewer leaves mean reduced water demand while damaged roots recover.
Step 5: Let roots air dry for 2-4 hours. This prevents immediate reinfection.
Repotting After Root Rot
Never reuse contaminated soil. Discard it completely.
Choose a pot with excellent drainage. Terra cotta works great because it breathes and wicks away excess moisture.
Use fresh, well-draining potting mix. Add extra perlite or orchid bark—aim for 40% drainage material, 60% potting soil.
Water sparingly after repotting. Keep soil barely moist, never wet, for the first two weeks.
Root Rot Recovery Stages
| Timeline | What’s Happening | Care Requirements |
|---|---|---|
| Days 1-3 | Roots stabilize, infection stops | Minimal water, bright indirect light |
| Days 4-7 | New root hairs begin forming | Light watering when top inch dry |
| Week 2-3 | Visible new growth on stems | Resume normal watering schedule |
| Week 4+ | Root system rebuilt | Return to regular fertilizing |
Tip 3: Shock Treatment for Light-Stressed Plants
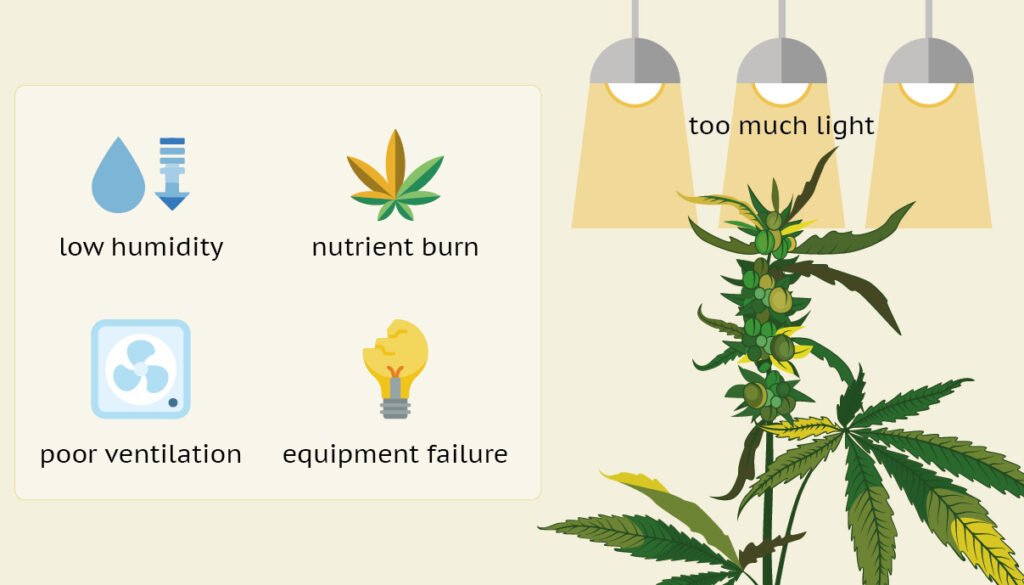
Wrong lighting causes more plant problems than most gardeners realize.
Too much light scorches leaves. Too little light causes weak, pale growth and stretching. Both conditions stress plants severely.
Sun Scorch Emergency Care
Brown, crispy patches on leaves indicate sun burn. This happens when shade-loving plants get direct sun, or when any plant moves from low to high light too quickly.
Immediate action:
Move the plant to lower light immediately. Even a few hours of continued burning causes permanent damage.
Trim away severely damaged leaves. They won’t recover and drain energy from the plant.
Increase humidity around the plant. Mist twice daily or place on a pebble tray with water.
Don’t fertilize burned plants. They need recovery time, not growth stimulation.
Rescuing Etiolated (Stretched) Plants
Low light causes leggy growth. Stems elongate, leaves grow far apart, and plants look weak and pale.
Recovery strategy:
Gradually increase light over 7-10 days. Sudden bright light after darkness causes shock.
Prune back stretched stems by one-third. This encourages bushier, more compact new growth.
Rotate the plant daily so all sides receive equal light exposure.
Once new, healthy growth appears, remove old leggy stems completely.
Light Adjustment Schedule
Moving plants between light conditions requires acclimation:
Week 1: Increase (or decrease) light exposure by 1-2 hours daily
Week 2: Add another 2-3 hours of changed conditions
Week 3: Plant fully adapted to new light levels
Rushing this process causes shock, leaf drop, and setbacks.
Optimal Light by Plant Type
Full Sun Plants (6+ hours direct): ████████████ Tomatoes, peppers, herbs
Bright Indirect Light: ██████████░░ Pothos, monsteras, most tropicals
Medium Light (filtered): ████████░░░░ Snake plants, prayer plants
Low Light Tolerant: ██████░░░░░░ ZZ plants, cast iron plants
Tip 4: Nutrient Deficiency Quick Fix
Yellow leaves don’t always mean overwatering.
Often they signal nutrient starvation. Plants show specific symptoms depending on which nutrients they lack.
Identifying Specific Deficiencies
Nitrogen deficiency: Old lower leaves turn yellow while new growth stays green. Overall pale appearance.
Iron deficiency: New leaves turn yellow with green veins. Called “interveinal chlorosis.”
Magnesium deficiency: Yellowing between leaf veins on older leaves. Edges may turn brown.
Phosphorus deficiency: Leaves develop purple or reddish tints, especially on undersides.
Fast-Acting Fertilizer Solutions
Liquid fertilizers work within 48-72 hours. Granular fertilizers take 1-2 weeks to show results.
For emergency recovery, choose liquid options:
Balanced liquid fertilizer (10-10-10 or 20-20-20): Addresses general nutrient depletion. Dilute to half strength for stressed plants.
Fish emulsion: Excellent nitrogen boost for pale, yellowing plants. Smells bad but works fast.
Liquid kelp: Provides micronutrients and growth hormones that stimulate recovery.
Epsom salt solution: Quick magnesium source. Dissolve 1 tablespoon in 1 gallon water, apply monthly.
Application Guidelines
Never fertilize bone-dry soil. Water lightly first, then apply diluted fertilizer 30 minutes later.
Sick plants need gentle treatment. Always use half the recommended fertilizer strength during recovery.
Apply liquid fertilizer every 7-10 days until improvement shows. Then switch to normal monthly feeding.
Nutrient Deficiency Recovery Timeline
| Days Since Treatment | Visible Changes |
|---|---|
| 2-3 days | Slight color improvement in existing leaves |
| 5-7 days | New growth emerges with proper coloring |
| 10-14 days | Overall plant vigor increases |
| 3-4 weeks | Full recovery, normal growth rate returns |
For more helpful home gardening tips and beginner-friendly advice, explore additional resources that can help you maintain thriving plants year-round.
Tip 5: Temperature and Humidity Rescue
Environmental stress kills plants slowly but surely.
Wrong temperature and humidity levels weaken plants, making them vulnerable to pests, diseases, and nutrient problems.
Emergency Humidity Boost
Most houseplants prefer 40-60% humidity. Winter heating systems often drop humidity to 15-25%.
Brown leaf tips, crispy edges, and bud drop all indicate low humidity stress.
Instant humidity solutions:
Pebble tray method: Fill a shallow tray with pebbles and water. Set pot on pebbles above water level. Evaporation creates a humid microclimate.
Grouping plants: Place plants close together. They create a shared humid zone through transpiration.
Bathroom relocation: Move struggling plants to bathrooms temporarily. Shower steam provides daily humidity boosts.
Humidifier investment: Small cool-mist humidifiers cost $20-40 and save countless plants.
Temperature Shock Recovery
Sudden temperature drops below 50°F damage tropical plants within hours. Heat above 90°F stresses most species.
If cold damage occurs:
Move plants to stable 65-75°F location immediately.
Remove any blackened or mushy foliage. Cold damage tissue won’t recover.
Reduce watering by 50%. Damaged roots absorb less water.
Wait for new growth before pruning extensively. Hidden buds may still be viable.
If heat stress happens:
Move to cooler location with good air circulation.
Increase watering frequency but not amount per watering.
Mist foliage to cool leaves through evaporation.
Provide afternoon shade even for sun-loving plants until recovery.
Creating Stable Microclimates
Plants recover faster in stable conditions. Eliminate these stress factors:
Drafts: Keep plants away from exterior doors and frequently opened windows.
Heating/AC vents: Direct airflow desiccates plants rapidly.
Temperature fluctuations: Avoid locations with 15°F+ daily swings.
Cold windowsills: Add insulation or move plants away during winter nights.
Combining Recovery Methods for Maximum Success
Dying plants often suffer from multiple problems simultaneously.
An overwatered plant might also have nutrient deficiencies and low light. Treating only one issue won’t save it.
The Systematic Recovery Approach
Week 1: Stabilize environmental conditions
- Fix watering issues (under or over)
- Adjust light appropriately
- Correct temperature and humidity problems
- Address any pest infestations
Week 2: Support recovery
- Begin gentle fertilization if deficiencies present
- Prune away dead or damaged tissue
- Monitor for improvement signs
- Maintain consistent care routine
Week 3-4: Encourage new growth
- Increase fertilizer to normal strength
- Optimize all environmental factors
- Remove any remaining damaged foliage
- Resume normal care schedule
What Recovery Looks Like
Realistic expectations prevent disappointment. Here’s what success means:
Short term (Days 1-7): Decline stops. No new yellowing or wilting appears. Existing leaves stabilize.
Medium term (Weeks 2-4): New growth emerges. Leaf color improves. Plant shows vigor.
Long term (Months 2-3): Plant returns to normal growth rate. Damaged areas fully replaced with healthy foliage.
Some damage is permanent. Scorched leaves won’t turn green again. Dead branches won’t resurrect. But new, healthy growth proves your plant is recovering.
Prevention: Stopping Problems Before They Start
Recovery is hard work. Prevention is easier.
Once you’ve saved a dying plant, keep it healthy with these practices:
Regular Monitoring Schedule
Check plants weekly for early warning signs:
- Soil moisture levels
- Leaf color and texture changes
- New growth patterns
- Pest presence
Early detection means simple fixes instead of emergency interventions.
Proper Watering Habits
More plants die from watering mistakes than all other causes combined.
The finger test: Insert your finger 2 inches into soil. Water only when it feels dry at that depth.
Weight method: Lift pots before and after watering. You’ll learn to judge moisture by weight.
Drainage is mandatory: Every pot needs drainage holes. No exceptions.
Seasonal Care Adjustments
Plants need different care throughout the year:
Winter: Reduce watering by 30-50%. Lower light and temperature slow growth. Minimal to no fertilizing.
Spring: Increase watering and feeding as growth accelerates. Best time for repotting.
Summer: Peak watering needs. Watch for heat stress. Provide shade during extreme heat.
Fall: Gradually reduce feeding. Prepare plants for slower winter metabolism.
You can learn more about plant care fundamentals from the USDA’s plant hardiness resources, which provide detailed guidance for maintaining healthy gardens.
When to Accept Defeat
Sometimes plants can’t be saved.
If you’ve tried everything for 4-6 weeks with zero improvement, it might be time to let go.
Signs a Plant is Truly Dead
- No green tissue anywhere on stems or roots
- All roots completely black and mushy
- Stems snap cleanly when bent (no flexibility)
- No new growth after 6+ weeks of optimal care
Salvaging Genetic Material
Before giving up completely, try propagation:
Take cuttings from any healthy-looking stems. Even plants with 90% damage might have viable propagation material.
Root cuttings in water or moist perlite. You might grow a whole new plant from a small cutting.
This works especially well with pothos, philodendrons, succulents, and many herbs.
Frequently Asked Questions
How long does it take to revive a dying plant?
Most plants show improvement within 7-10 days of proper treatment. Full recovery typically takes 4-8 weeks depending on damage severity. Plants with minor stress recover in days, while those with root rot or severe deficiencies need months.
Can yellow leaves turn green again?
No. Once a leaf turns yellow, it stays yellow. However, proper care prevents new leaves from yellowing and allows the plant to grow fresh, healthy foliage. Remove yellow leaves only if they’re completely dead or causing aesthetic problems.
Should I fertilize a dying plant?
Not immediately. First stabilize watering, light, and temperature. Wait until the plant stops declining (usually 5-7 days) before adding diluted fertilizer. Fertilizing severely stressed plants often makes problems worse.
Is it better to underwater or overwater when unsure?
Underwater. Underwatered plants recover within hours to days of proper soaking. Overwatered plants develop root rot that takes weeks to overcome and often proves fatal. When in doubt, check soil moisture before watering.
What’s the fastest way to tell if my plant is dying or just dormant?
Scratch a small section of stem with your fingernail. Green tissue underneath means the plant is alive (dormant or stressed). Brown or dry tissue throughout indicates death. Check multiple locations for accurate assessment.
Can I save a plant with no leaves left?
Sometimes. If stems remain green and flexible with viable buds, new leaves may sprout within 2-4 weeks. Maintain proper care and be patient. If stems are brown and brittle throughout, the plant is dead.
Do dying plants need more or less water than healthy ones?
It depends on why they’re dying. Overwatered plants need less water and better drainage. Underwatered plants need thorough soaking. Root-damaged plants need minimal water until new roots grow. Always diagnose the problem before adjusting watering.
Your Plant’s Second Chance Starts Today
Every gardener loses plants sometimes. It’s part of the learning process.
But with these five fast recovery tips, you’ve got the knowledge to save most struggling plants before they reach the point of no return.
The yellowing leaves, the wilting stems, the mysterious decline—they’re all solvable problems when you act quickly with the right methods.
Remember that plants are resilient. They want to survive. Your job is simply removing obstacles and providing what they need to thrive.
Start with accurate diagnosis. Is it water, light, nutrients, roots, or environment causing the problem?
Then apply the appropriate recovery technique systematically and patiently.
Monitor daily for signs of improvement. Celebrate small victories like a newly unfurled leaf or a stem that regains its firmness.
Most importantly, learn from each challenge. Every plant you save teaches you skills that prevent future emergencies.
That dying plant on your windowsill? It’s not gone yet. You have the tools to bring it back.
Stop reading and start rescuing. Your plants are counting on you.


