It’s Your Soil That Will Determine What Your Garden Can Be
Step into a garden that’s thriving and you’ll sense it. The plants look vibrant. Vegetables grow bigger. Flowers bloom brighter. The key isn’t luck or expensive products.
It’s the soil.
Healthy soil teems with billions of microorganisms, abundant nutrients and the perfect structure. Bad soil results in weak plants, poor harvests and lots of frustrated gardeners.
Many gardeners concentrate on seeds, watering times and sunlight. They neglect the base that makes all of this achievable. Your soil feeds your plants. It delivers water, air and nutrients roots require to grow.
The good news? You don’t have to have a degree in science to enhance your soil. These eight simple techniques are for newbies and for green-thumbed gardeners, too. Every method creates healthier soil in a natural way that requires no complex equipment or chemicals.
This is how you specifically take care of your garden soil. You’ll learn the simplest ways to get truly impressive results in plant health and garden productivity.
Soil Care: It’s Not Sexy, but It’s Crucial
Soil isn’t just dirt. It is a complicated ecosystem that positions your garden for success or failure.
Soil is the life foundation for plants, and it provides three essentials:
Nutrients: Plants require nitrogen, phosphorus and potassium as well as trace minerals to grow.
Water: Soil retains water between waterings and slowly delivers it to roots.
Air: The roots of your plant require air too! Good soil will have space in the particles for air to move.
Without these elements in soil, plants do poorly. They do not grow as fast, produce less food and are susceptible to diseases and pests.
Healthy soil solves these issues on its own. It is the ideal setting for plants to achieve their growth.
Method 1: Test Your Soil Before You Do Anything
You can’t solve problems that you don’t understand. Soil testing will uncover just what your garden needs.
Why Testing Saves Time and Money
When people guess at soil problems they squander money on unnecessary amendments. You could be adding fertilizer when your soil already has an abundance of those nutrients. Or you could neglect a life-threatening pH imbalance that makes it impossible for plants to absorb nutrients.
A simple soil test shows:
- pH level (acidity or alkalinity)
- Nitrogen, phosphorus, and potassium levels
- Organic matter content
- Texture and composition
How to Test Your Soil
Option 1: Home Test Kits
Buy a basic kit at any garden center. They cost $10 to $20, and provide a fast answer.
Gather soil samples in various parts of your garden. Combine them in a clean bucket. Use the kit directions to test pH and major nutrients.
Option 2: Professional Lab Testing
Call your local extension office. Most offer complete soil testing for $15 to $40.
This is a detailed test that includes micronutrients, organic matter percentage and specific recommendations for your area.
Reading Your Results
pH levels:
- Less than 6.0: Too acidic for many plants
- 6.0 to 7.0: Ideal for vegetables, flowers and various plants
- Over 7.5: Too alkaline for most plants
Nutrient levels:
- Low: Add amendments before planting
- Medium: Maintain current practices
- High: Reduce or skip fertilizing
Test your soil every two to three years. This monitors changes and prompts you to adjust your care.
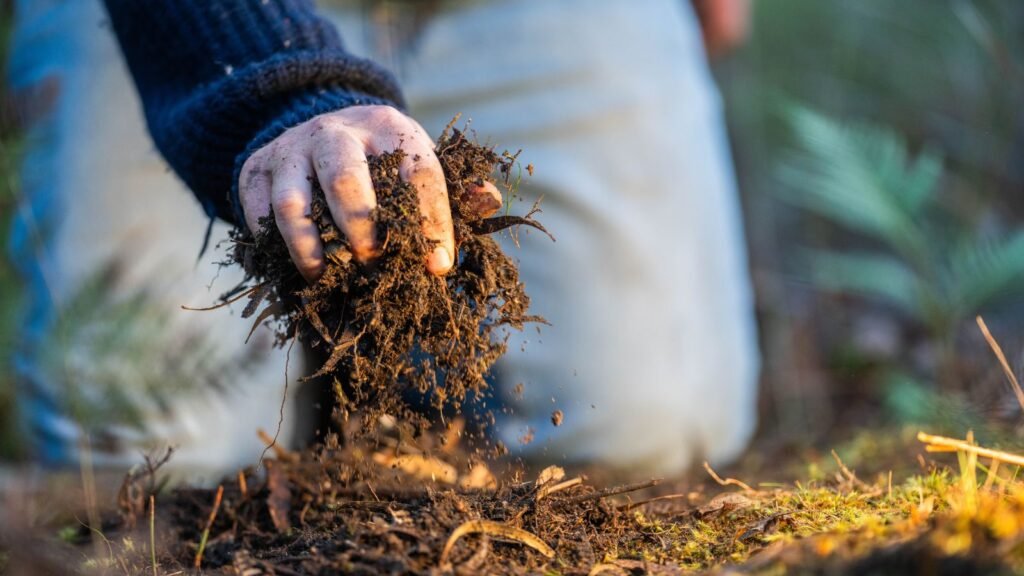
Method 2: Add Organic Matter Consistently
Most soil issues can be resolved with organic matter. It enhances the drainage in clay soil and water retention in sandy soil.
What Counts as Organic Matter
Organic matter is anything that was once alive:
- Compost made from kitchen wastes and yard trimmings
- Aged manure from herbivores (cows, horses, chickens)
- Shredded leaves
- Grass clippings
- Straw or hay
- Coconut coir
- Peat moss
Compost is a top choice because it is free, easy to produce and offers balanced nutrition.
How Much to Add
Add 2 to 4 inches of organic matter to the garden beds every year. Incorporate it into the top 6 to 8 inches of soil before planting.
For established beds, apply a 1-inch layer to surround plants as mulch. Earthworms and microorganisms slowly pull it into the soil.
The Magic of Organic Matter
Enhances soil structure: Gives soil perfect crumbly texture roots can naturally penetrate.
Captures more water: Acts like a sponge, cutting watering by 30 to 50 percent.
Feeds beneficial microbes: It is food for bacteria and fungi that make it easier for plants to take in nutrients.
Slow-release nutrients: Decomposes gradually, feeding your plants for months instead of all at once.
Buffers pH shifts: Is useful in maintaining soil in a stable pH condition – less acidic or alkaline.
You cannot have too much organic matter in your garden soil. More is always better.
Method 3: Practice Smart Mulching Techniques
Mulch protects soil in the same way a blanket keeps you warm on frosty nights. It has a moderating influence on the temperature, acts as a water conservator and prevents troubles.
Types of Mulch
Organic mulches:
- Shredded bark or wood chips
- Straw
- Dried leaves
- Grass clippings (thin layers only)
- Pine needles
Inorganic mulches:
- Landscape fabric
- Plastic sheeting
- Gravel or stone
Organic mulches are best for soil health because they decompose and add nutrients over time.
Proper Mulching Steps
Step 1: First remove weeds in the area.
Step 2: Water the soil deeply before adding a thick layer of mulch.
Step 3: Apply 2 to 4 inches of mulch around plants.
Step 4: Maintain a distance of 2 to 3 inches between mulch and plant stems or tree trunks. Direct contact causes rot.
Step 5: Replace mulch layers each spring as old material decays.
Benefits You’ll Notice Immediately
Cuts watering: Mulch reduces water evaporation up to 70 percent.
Controls weeds: Prevents sunlight from reaching weed seeds helping to prevent their germination.
Temperature control: The soil is kept cooler in the summer and warmer in the winter.
Prevents erosion: Keeps topsoil from being washed away during heavy rain.
Enhances aesthetics: Garden beds look tidy and polished.
For broader garden advice and soil enhancement information, please visit our home gardening resource center.
Method 4: Rotate Your Crops Seasonally
Repeating the same crops in the same spots year after year leaches nutrients from soil and breeds disease. Both these difficulties are solved naturally by crop rotation.
The Basic Rotation System
Classify plants into one of four groups, according to nutrient needs:
Group 1 – Heavy Feeders: Tomatoes, peppers, corn, squash, cabbage
Group 2 – Light Feeders: Herbs, garlic, onions, lettuce, radishes
Group 3 – Soil Builders: Beans, peas, clover, alfalfa
Group 4 – Root Vegetables: Carrots, beets, potatoes, turnips
Four-Year Rotation Plan
Year 1: Heavy Feeders in Section A, Light Feeders in Section B, Soil Builders in Section C, Root Crops in Section D.
Year 2: Shift everyone up by one. Heavy feeders go to Section B, light feeders to Section C, and so on.
Year 3: Continue rotating. Every group shifts clockwise one section.
Year 4: Complete the cycle. Both groups return back to their starting sections.
Why This Works
Heavy feeders need a lot of nitrogen. Succeeding them with soil builders (legumes) replaces the nitrogen naturally. Light feeders and root crops do not require as much, allowing the soil an opportunity to rebound.
Another advantage of rotation is that it disrupts pest and disease cycles. Many problems affect particular plant families. Rotating plants keeps problems from building up in one area.
Method 5: Use Cover Crops During Off-Season
When garden beds go empty they become victims of topsoil loss from erosion and compaction. Cover crops safeguard and enhance your soil when you aren’t growing vegetables.
Best Cover Crops for Home Gardeners
Winter rye: Sow in the autumn, grows during winter, and in the spring it can be plowed under. Contributes organic matter and inhibits erosion.
Crimson clover: Nitrogen fixer in the soil. Beautiful red flowers attract pollinators. Sow in the late summer or early fall.
Buckwheat: Fast-growing summer cover crop. Gets to maximum size within 6 to 8 weeks. Breaks up compacted soil with deep roots.
Annual ryegrass: Quick germination. Does a wonderful job of erosion control on hills. Plant in fall.
Hairy vetch: Nitrogen-fixing winter annual. Provides excellent organic matter. Plant in late summer.
How to Plant Cover Crops
Timing: Plant in late summer or fall after the vegetable harvest.
Preparation: Clear crop debris and loosen top inch of soil with rake.
Seeding: Sow the seed evenly over the area. Lightly rake just to cover seeds with soil.
Watering: Water thoroughly after planting. Maintain even moisture until seeds germinate.
Mowing: Mow down cover crops when they begin to flower, but before seeds are produced.
Incorporating: Apply 2 to 3 weeks after mowing. Then work plants into soil or leave them on top as mulch.
The Hidden Benefits
Cover crops do more than cover bare ground. They:
- Add 50 to 150 pounds of nitrogen per acre (for legumes)
- Break up hardpan with deep roots
- Attract beneficial insects
- Suppress weeds naturally
- Increase earthworm populations
Method 6: Maintain Proper Soil Moisture Levels
Plants drown in too much water. Not enough water causes stress for plants and stunts growth. Moisture is key to soil health and getting it right is crucial.
Signs of Watering Problems
Overwatering symptoms:
- Yellow leaves that fall off
- Mushy stems
- Fungal growth on soil surface
- Foul smell from soil
Underwatering symptoms:
- Wilting despite morning watering
- Crispy, brown leaf edges
- Slow growth
- Premature fruit drop
The Finger Test
Stick a finger 2 inches into the soil near plants. If it feels:
- Wet: Don’t water yet
- Slightly damp: Check again tomorrow
- Dry: Time to water deeply
This quick test is more effective than watering on a schedule.
Best Watering Practices
Water deeply but less frequently: Provide plants with 1 to 2 inches of water once or twice a week. Deep water promotes the development of deep roots.
Water in the early morning: This will minimize evaporation loss and allow leaves to dry out before the evening. Wet leaves at night can lead to fungal diseases.
Use soaker hoses or drip irrigation: This will bring water straight to soil instead of wetting the leaves. Uses 30 to 50 percent less water than sprinklers.
Determine soil type: Sandy soil requires watering more often. Clay needs to be watered less often but for longer.
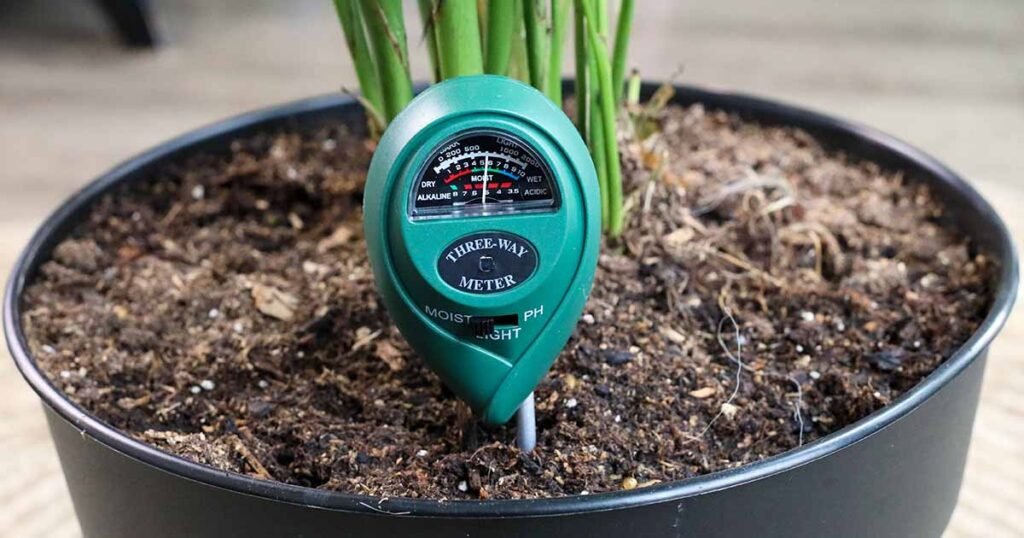
Moisture Monitoring Tools
Soil moisture meters: Stick probe into soil for immediate reading. Cost $10 to $30.
Tensiometers: Measure soil water tension. More accurate but costlier ($40 to $100).
Rain gauges: Monitor natural rainfall to adjust irrigation schedules.
Method 7: Avoid Soil Compaction
Compacted soil doesn’t have air spaces that enable roots and microorganisms to breathe. It leads to inadequate drainage, fragile root structure and underdeveloped plants.
Common Causes of Compaction
Stepping in wet soil: Your feet are compressing air pockets when soil is saturated.
Heavy machinery: Rototillers and tractors compact soil layers deep beneath the surface.
Poor drainage: Standing water compresses soil particles.
Absence of organic matter: The particles of clay are clumped together tightly in the absence of organic matter which would keep them separate.
Prevention Strategies
Establish permanent paths: Create walking zones between beds. Include an edging of stone, brick or wood chips.
Use raised beds: Construct a garden above the ground. You don’t want to step into growing areas.
Incorporate organic matter: Mix in compost every year. This creates firm soil structure that is less susceptible to compaction.
Ensure proper drainage: Grade beds to slope gently. Install drainage tiles if water pools up consistently.
Do not till wet soil: Wait for the soil to crumble easily when you touch it before working.
Fixing Compacted Soil
For small areas: Loosen top 8 to 12 inches with a garden fork. Twist the fork slightly from side to side, but don’t lift out the soil.
For larger areas: Sow deep-rooted cover crops such as radishes or turnips. They grow roots naturally breaking through hardpan.
Add gypsum: This mineral aids clay particles in spreading apart. Apply as directed on the package, which is typically 20 to 40 pounds per 1,000 square feet.
Method 8: Feed Soil Microorganisms Regularly
Your soil is swarming with billions of tiny, unseen workers. Bacteria, fungi, protozoa and nematodes decompose organic matter and release nutrients to plants.
What Soil Microbes Need
Food: Organic matter like compost, mulch and crop residue.
Water: Evenly moist, but not waterlogged soil.
Air: The oxygen found in the soil pores, formed between soil particles.
Neutral pH: A large number of beneficial microbes thrive at pH values between 6.0 and 7.5.
Stable temperature: Both mulch and organic matter insulate soil from high heat as well as freezing.
Ways to Boost Microbial Activity
Add compost tea: Soak finished compost in water for 24 to 48 hours. Dilute 1:10 with water. Spray on soil monthly during growing months.
Use mycorrhizal fungi: Helpful fungi will attach to plant roots and reach out their networks. Purchase inoculants at garden centers. Apply when transplanting seedlings.
Minimize tilling: Too much digging interrupts fungal networks. Use no-till methods when possible.
Avoid synthetic chemicals: Strong fertilizers and pesticides kill not only pests but also beneficial organisms.
Maintain consistent moisture: Dry soil deactivates microbes. Keep soil evenly moist.
Benefits of Thriving Soil Life
Improved nutrient cycling: Microbes transform otherwise unavailable nutrients into a form that plants can access.
Disease suppression: Good microbes can compete with bad pathogens for space and resources.
Better soil structure: Fungal hyphae and bacterial secretions bind soil particles into stable aggregates.
Higher drought resilience: Healthy microbial populations help soils hold onto more water.
Read more about soil biology and sustainable techniques from the USDA Natural Resources Conservation Service.
Soil Care Comparison Table
| Method | Cost | Effort Level | Time to Results | Best For |
|---|---|---|---|---|
| Soil Testing | Low ($10-40) | Low | Immediate | All gardens |
| Adding Organic Matter | Free-Low | Medium | 3-6 months | All soil types |
| Mulching | Low-Medium | Low | Immediate | Water conservation |
| Crop Rotation | Free | Medium | 1 year | Vegetable gardens |
| Cover Crops | Low ($20-50) | Medium | 3-6 months | Off-season care |
| Moisture Management | Low-Medium | Ongoing | Immediate | All gardens |
| Compaction Prevention | Free-Low | Low | Ongoing | Clay soils |
| Feeding Microbes | Low | Low | 1-3 months | Building soil life |
Creating Your Soil Care Schedule
Consistency matters more than intensity. Use this timeline to ensure soil is healthy all season.
Spring Tasks (March – May)
- Test soil pH and nutrients
- Add 2 to 4 inches of compost to beds
- Apply fresh mulch layers
- Plant cover crops in empty spots
- Check moisture levels twice weekly
Summer Tasks (June – August)
- Maintain 2 to 4 inch mulch layer
- Deep water once or twice a week
- Add compost tea monthly
- Monitor for compaction on paths
- Side-dress heavy feeders with compost
Fall Tasks (September – November)
- Plant winter cover crops
- Add organic matter to beds
- Gather leaves to use for mulch or compost
- Refresh mulch layers
- Test soil if you didn’t in the spring
Winter Tasks (December – February)
- Plan next year’s crop rotation
- Order cover crop seeds
- Build or repair raised beds
- Research soil improvement techniques
- Let cover crops grow undisturbed
Common Soil Care Mistakes to Avoid
There are mistakes nearly all gardeners make. It pays to understand them as you avoid expensive issues.
Over-fertilizing: Nutrients in excess burn plant roots and pollute groundwater. Follow soil test recommendations exactly.
Using fresh manure: Uncomposted manure will burn plants and may contain weed seeds. Age it 6 to 12 months before using.
Tilling too much: Overworking soil destroys structure and kills beneficial organisms. Till only when creating new beds.
Neglecting drainage: Bad drainage contributes more than any other issue to soil failure. Fix it before planting.
Failing to test the soil: Guessing about soil needs is a huge waste of your time and money. Get tested at least every 2 to 3 years.
Planting too early: Tilling cold, wet soil causes compaction and clods. Wait until soil crumbles easily.
Relying on synthetic fertilizers alone: Chemical fertilizers supply nutrients, but do not help soil structure or the microbes that live in it. Combine with organic matter.
Frequently Asked Questions
How often should I apply compost to my garden?
Apply 1 to 2 inches of compost each year to keep the soil healthy. For new beds or very poor soil, add 3 to 4 inches and work it in deeply. When it comes to garden soil, you can never add too much compost.
Is there any way to improve clay soil without replacing it?
Absolutely. Add 3 to 4 inches of compost and work it into the top 8 inches. Do this every year, 2 to 3 years in a row. Plant deep-rooted cover crops. When soil is wet, avoid walking on beds. These methods transform clay gradually.
What’s the quickest way to improve bad soil?
Raised beds filled with quality soil mix provide instant results. For in-ground gardens, applying 4 inches of compost and planting cover crops works the soil back to health in one season. Both are faster than waiting for native soil to improve on its own.
Is sandy soil fixable?
Yes. Sandy soil is loose and drains too fast and retains few nutrients. Incorporate organic matter regularly — at least 3 to 4 inches every year. Use a heavy mulch to reduce water loss. Organic matter works like a sponge, holding water and nutrients that the sand can’t hold.
How can I tell if my soil is rich and fertile?
Soil testing is the only real answer. Paleness of leaves and slowness of growth are visual clues that can suggest a deficiency, but symptoms vary by nutrient. A $20 test eliminates guesswork and guards against overfertilizing.
Should I rototill my garden every year?
No. Tilling soil year after year damages soil structure and reduces beneficial fungi and bacteria populations. Till only when creating new beds. Then, use no-till methods: Mulch and topdress with compost, allowing earthworms to incorporate it naturally.
Can I use grass clippings as mulch?
Yes, but only apply very thin layers, maximum 1/2 inch. Thick layers of grass clippings form a slimy, smelly mat that prevents air and moisture from reaching plant roots. Allow clippings to dry a bit before spreading. Combine them with other mulch options for best results.
What is the preferred pH of most vegetables?
The majority of vegetables do best in a slightly acidic to neutral pH range (6.0–7.0). Potatoes like their soil on the acidic side (5.5 to 6.5). Asparagus prefers soil that is slightly alkaline (6.5 to 7.5). Test your soil and modify pH with the addition of lime (to raise) or sulfur (to lower).
Your Soil Journey Starts Now
Healthy soil doesn’t happen overnight. It develops gradually through consistent care and attention.
These eight methods work together synergistically. Adding organic matter feeds microorganisms. Mulching protects the organic matter. Testing guides your amendments. Rotation prevents problems. Each technique supports the others.
Start with one or two of these today. Get a soil test if you haven’t yet. Top-dress your beds with compost. Put fresh mulch around your plants.
Observe how these minor changes influence the productivity of your garden over the next few months. Plants develop stronger root systems. Leaves look greener and healthier. Vegetables produce more abundant harvests.
Add more methods to your routine as you gain confidence. Plant a cover crop in empty beds. Make a crop rotation plan for next year. Create raised beds to avoid compacting the soil.
The best gardeners know this fundamental truth: feeding the soil feeds the plants. Chemical fertilizers can offer quick fixes, but they don’t build long-term soil health.
Organic techniques build living soil that improves with age. You are making your garden easier to maintain as the soil does more work on its own.
Every handful of compost you add, every cover crop you plant, every layer of mulch you spread is a part of this transformation. You aren’t only growing plants — you are creating an ecosystem.
Time spent tending the soil will return dividends for years to come. Bigger harvests, healthier plants, less pest pressure and less time watering or fertilizing.
The potential for your garden is limited only by the health of your soil. Take steps to improve it today with these eight simple strategies. Your future plants will thank you with beautiful growth and plentiful yields.


